
Configuring LTI Integration with Canvas
Connect your Canvas instance to BetterExaminations to handle User and course provisioning as well as Grade Syncing
To configure a Canvas integration in BetterExaminations, you must complete setup steps within BetterExaminations and within Canvas
First, you must configure the integration in BetterExaminations, and then complete the setup by adding the integration in Canvas.
Configuring The Integration In BetterExaminations
1. To add LTI integration to BetterExaminations, go to the Settings screen and scroll to the "LTI Integrations" section. You’ll see a list of existing integrations (if you have any). You can configure a new integration by clicking the 'Add integration' button on the right.
2. Select your LTI Platform from the list and then give your integration a name. This name is what will be shown to users throughout BetterExaminations so make sure to name it something meaningful for your users such as "Canvas" or "QA Canvas" etc.

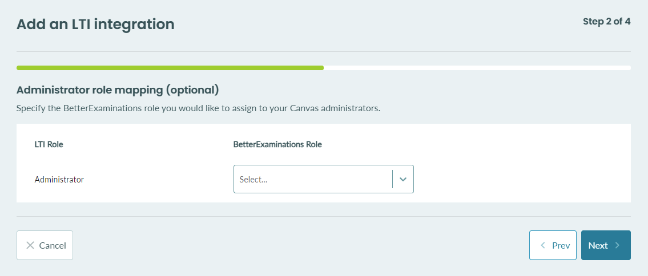
3. In this step you can decide which BetterExaminations User Role should be assigned to any Canvas Administrators when they use the LTI Integration. This step is optional, if you leave it blank Canvas administrators will be treated like standard users within BetterExaminations.
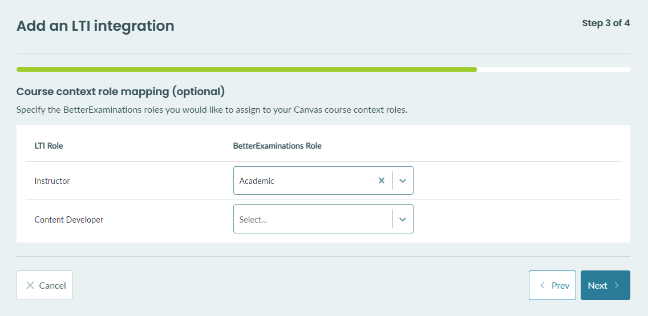
4. The next step allows you to map LTI Context Roles to BetterExaminations Course Roles.
NOTE: The roles available for mapping are LTI context roles and NOT your Canvas course roles. This means Canvas is converting your Course roles into LTI context roles and then these context roles are then made available to map to BetterExaminations for mapping to BetterExaminations Course roles.
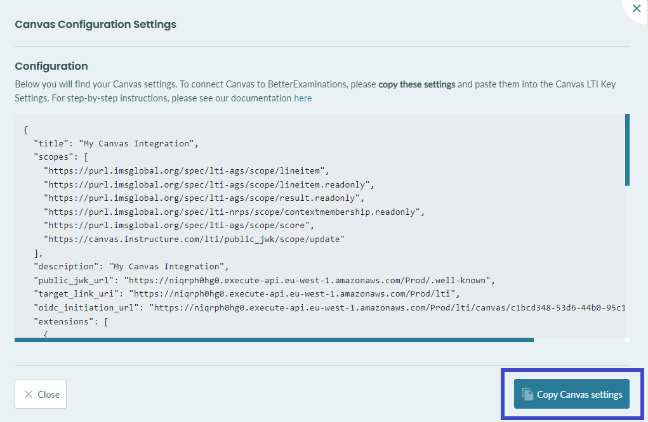
5. The final screen will display an overview to give you an opportunity to confirm all the options you've selected. Once you're happy, click 'Generate Canvas configuration'.

6. You should now see a popup box containing your Canvas configuration settings. Click 'Copy Canvas settings' to copy these settings to your clipboard.
At this point, you should keep this window open, open a new tab and log in to Canvas.
Configuring The Integration In Canvas
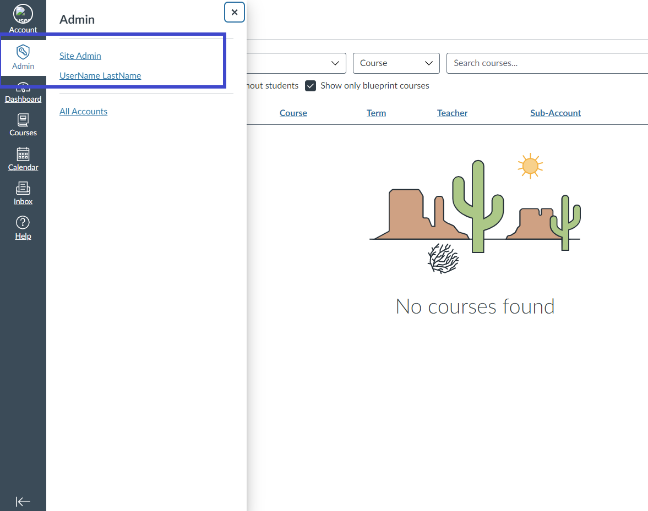
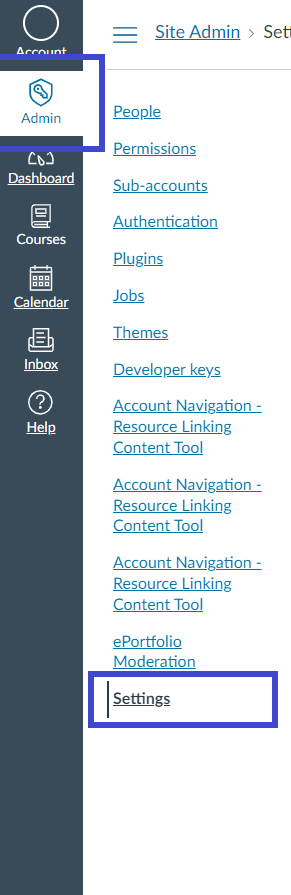
1. Login to Canvas and from the panel on the left-hand side, select 'Admin' and then select your organisation. In this case, we select Canvas BetterExaminations.
2. From the links on the left-hand side, select 'Developer Keys'

3. Click '+ Developer Key' and select 'LTI Key'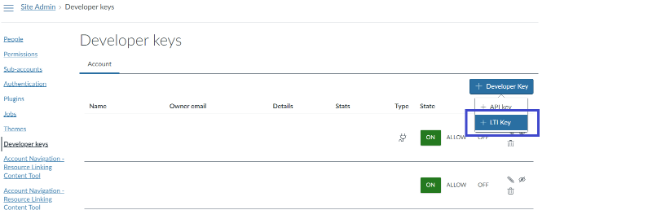
4. From the 'Method' dropdown under the Configure heading, select 'Paste JSON'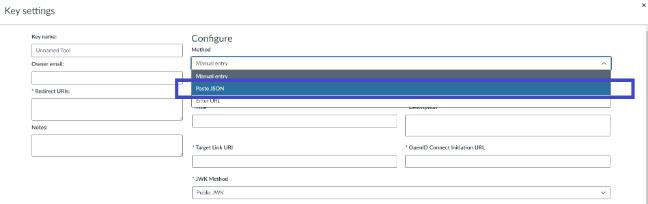
5. This is where you will need the copied settings from BetterExaminations. If you have not got your settings copied, go back to BetterExaminations and click 'Copy Canvas settings' again. If you have closed the settings popup box, you can get your Canvas settings by finding your Canvas LTI configuration listed near the bottom of the BetterExaminations setting page and selecting 'Edit'. Then go to the configuration tab and your settings will be there.
Paste your settings into the LTI 1.3 Configuration textbox
6. You can give your integration a name on the top left-hand side 'Key name' field.

7. Click 'Save' on the bottom right-hand side to save your new integration.
8. Your new key will be turned off by default. Select ON to allow this key to be used

9. Copy the number listed in the details column (highlighted below). You will need this to complete the configuration in Canvas.

10. From the left-hand side panel, select 'Admin', then select your organisation, then click on 'Settings' at the bottom of the list
11. From the “Settings” navigation across the top of the screen, select 'Apps' then select 'View App Configurations'

12. Select '+ App'

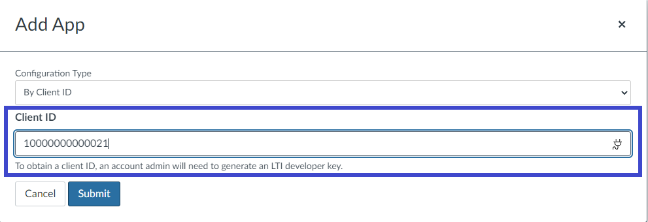
12. From the Configuration Type dropdown, select 'By Client ID'

12. Paste the client ID into the client ID field and click Submit
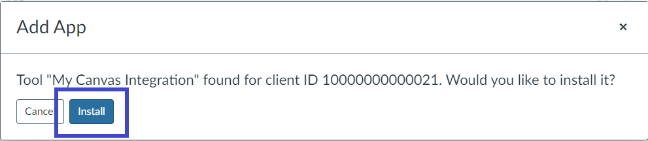
13. You will see a popup box with your tool name asking if you would like to install it. Click on 'install'
14. You should now see your tool name listed under the external apps.
15. To confirm your Canvas integration was successful, go to the homepage of any course. Click the link on the left-hand side near the bottom that reads 'Go to course in BetterExaminations'.
Your Canvas course will be synced with BetterExaminations and you will be redirected to the exams page within that course. From here, you can create and schedule exams for that course.
For more information on using your Canvas Integration, see our documentation here