Cover Pages
How to build and assign cover pages to documents
What is a Cover Page?
A cover page is a standardised front page that is attached to exam documents during the workflow process. It typically contains key information about the assessment - such as the course name, course code, institution name, academic year, and any other details configured by your organisation.
Cover pages ensure that every printed exam paper is clearly identified and consistently formatted, reducing the risk of mix-ups and saving staff time that would otherwise be spent manually creating or formatting front pages.
What is the Cover Page Builder?
The Cover Page Builder is a tool within the document workflow that lets staff fill in the information that will appear on a cover page, preview how it will look (depending on format), and assign it to one or more documents in a document set.
Once assigned, the cover page is automatically added as page 1 of the document when it is approved for printing. No manual formatting required.
What is a Cover Page Template?
When setting up your organisation, we will help you build your cover page template. This is the template from which your cover page will be generated and attached to your exam papers. You can decide what information you want your users to fill in and where it will be placed on the cover page. You can also pre-populate some information (such as course names and codes etc) from the data already stored in the platform.
Who Can Use It?
You need the course role with the 'Add/remove cover page information' permission to build and assign cover pages. If you don't have this permission, you will see a warning message and the fields will be read-only. Contact your administrator if you need access.
Is the Cover Page Required?
Depending on your organisations needs, you have multiple configurable options outlined below.
1. You can decide which document types users are able to attach cover pages to. For exam, exam papers may need cover pages but marking schemes may not.
2. You can decide to enforce cover page assignment before documents are sent for review to ensure uploaders always attach cover pages.
How to Use the Cover Page Builder
1. Navigate to the relevant exam document set and select the Cover Page Builder tab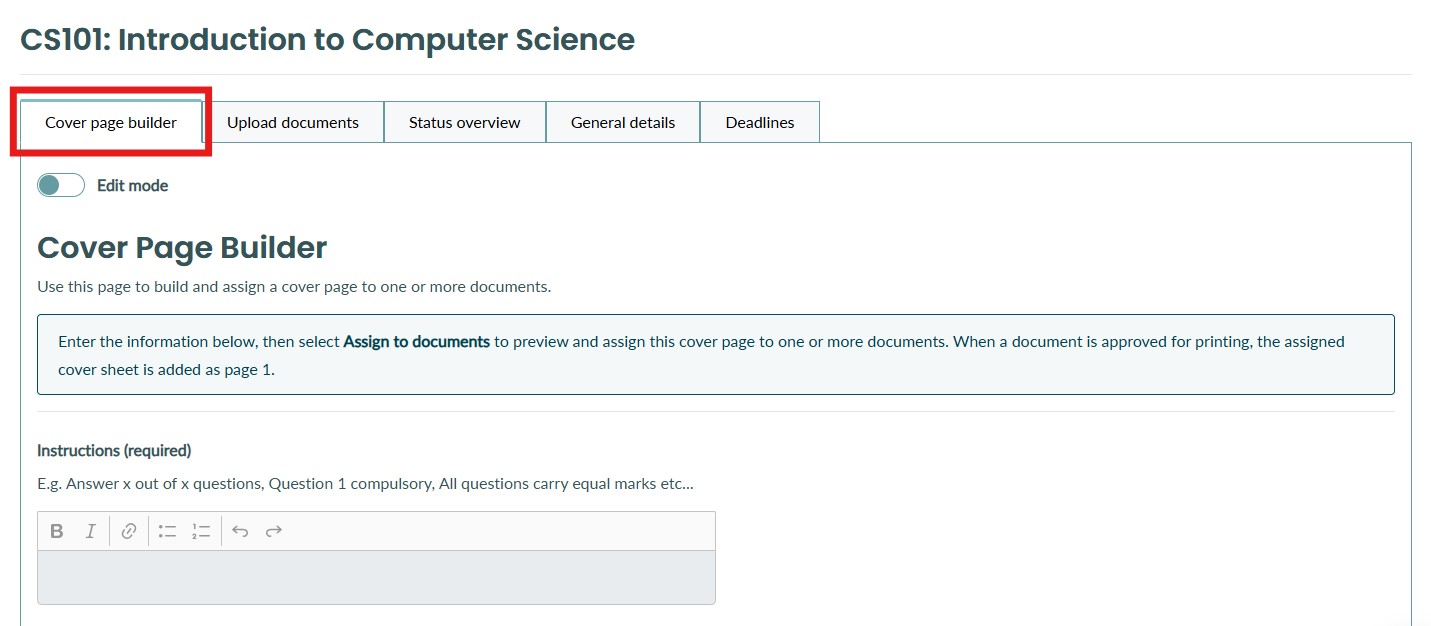
2. Toggle Edit mode on using the switch at the top of the page. This unlocks the fields so you can enter information.
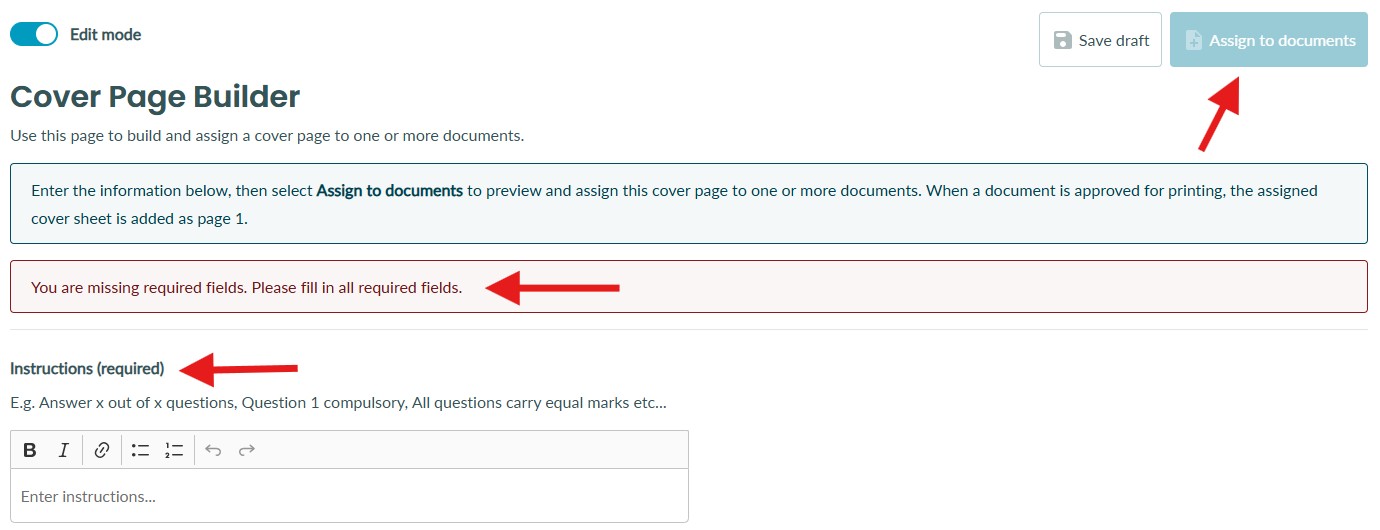
3. Complete the fields displayed on the page. Fields marked as (required) must be filled in before you can assign the cover page to documents. Your organisation determines what fields are required and what fields are optional.
If any required fields are missing, a warning will appear and the Assign to documents button will remain disabled until they are completed.
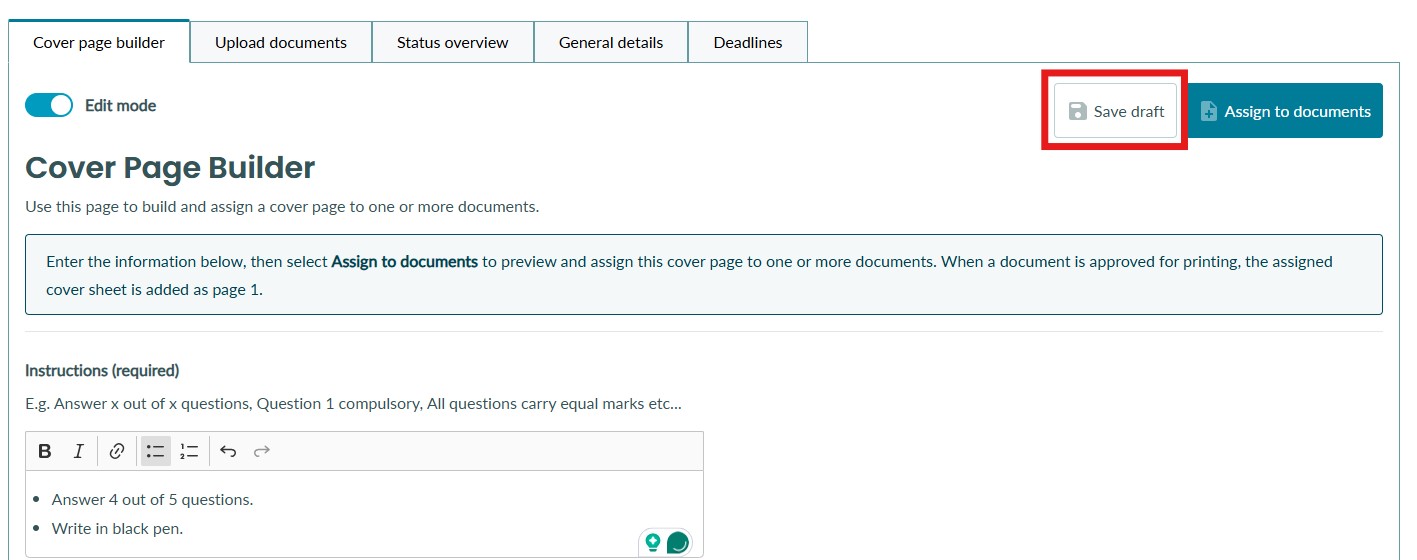
4. If you're not ready to assign the cover page yet, click Save draft to save your progress. You can return later to complete the remaining fields.
5. Once all required fields are filled in, click Assign to documents. A preview modal will open showing:
-
A full preview of how the cover page will look when printed
-
A document selector where you can choose which documents in the set to assign the cover page to
NOTE: If your document is a word document (not a PDF), you will not see a preview of the cover page. You must generate and download the word document cover page to see a preview of it.
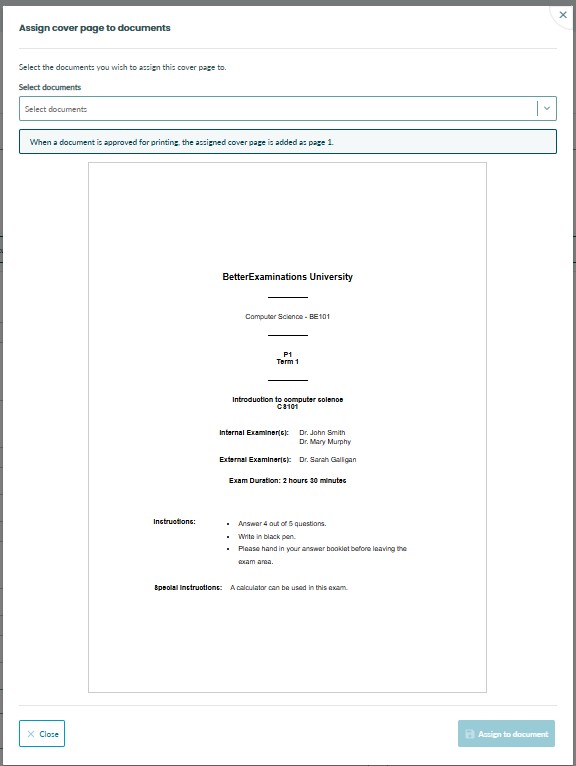
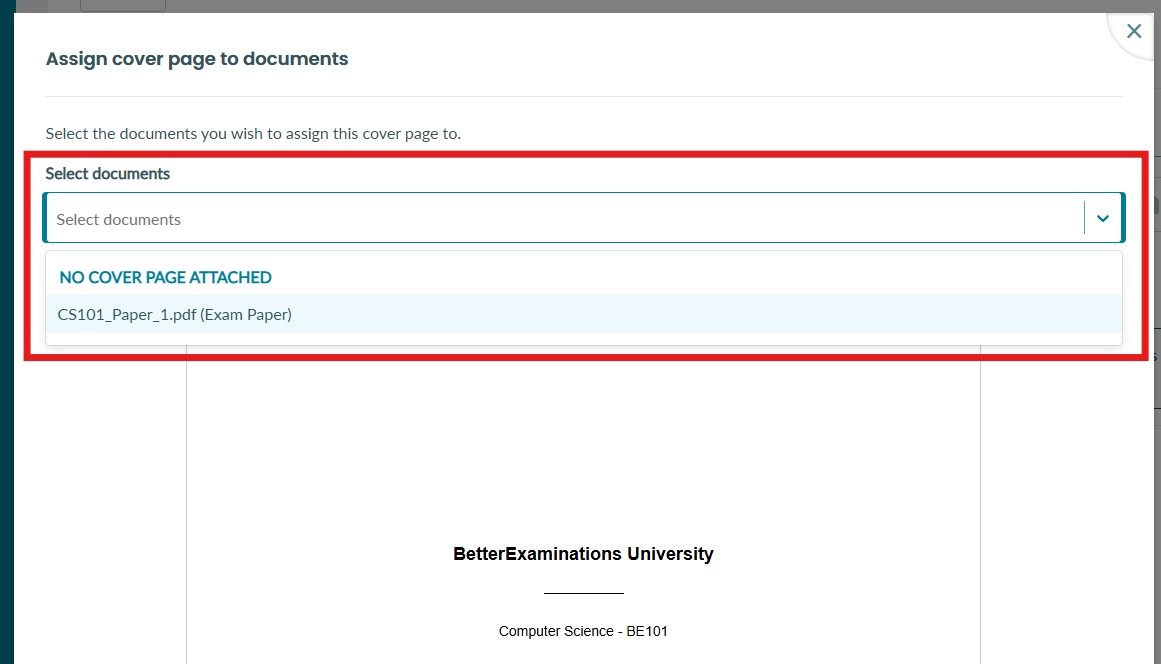
6. Select one or more documents from the dropdown menu. Only document types that your organisation allows cover pages to be attached to will appear in the dropdown.
Documents are grouped into:
-
No cover page attached - documents that don't yet have a cover page
-
Cover page already attached - documents that have a cover page assigned (you can reassign/update these)
-
Already approved for printing (Unavailable) - documents that have already been approved for printing and cannot be changed
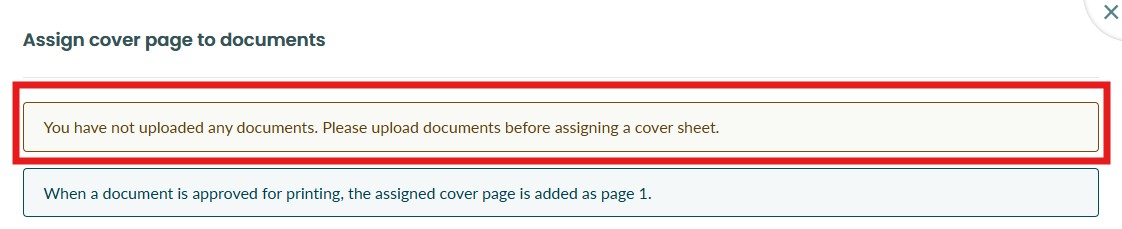
If you have not uploaded any documents yet, you can still preview the cover page but you will see this warning message.
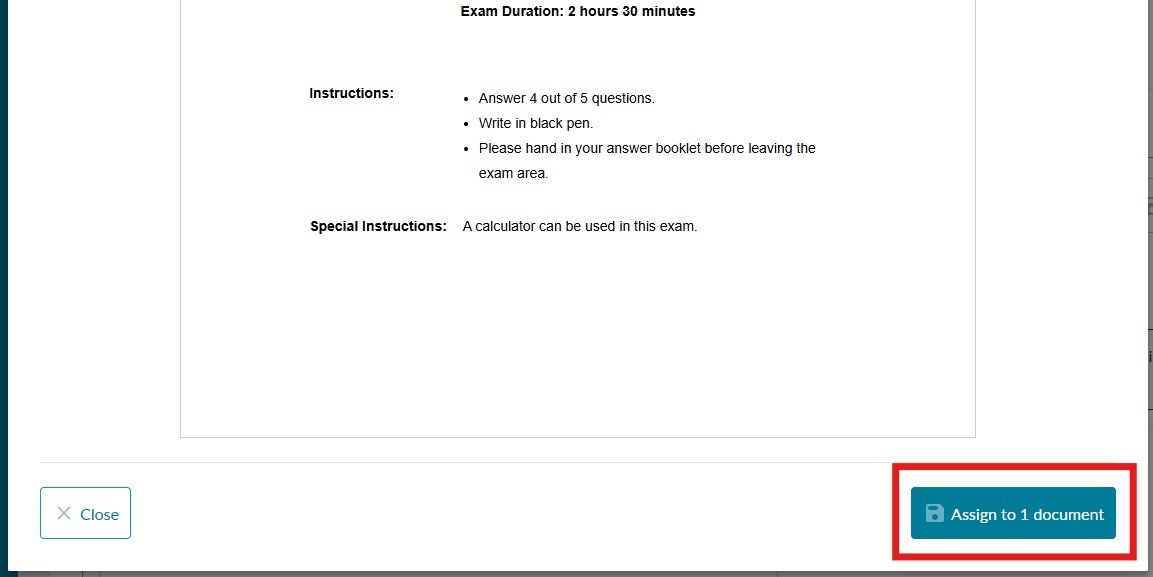
7. To assign the cover page to the selected documents, select 'Assign to X documents' at the bottom of the preview.
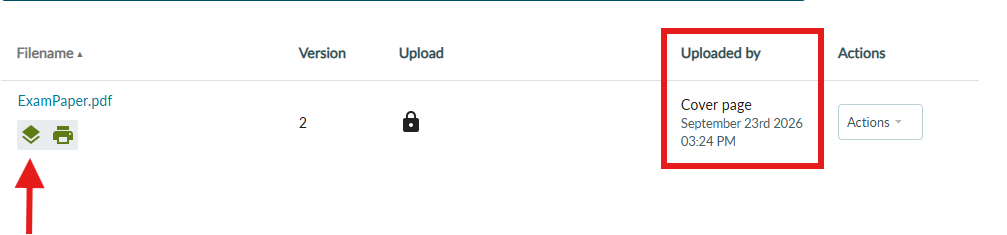
8. You can confirm a cover page has been assigned to a document by navigating to the folder where the document is and looking for the cover page icon. 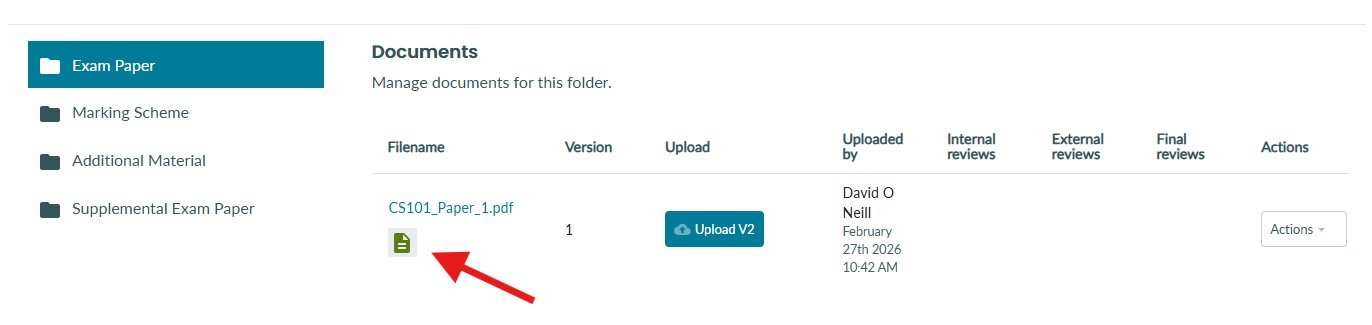
Hover over the icon to see more information. 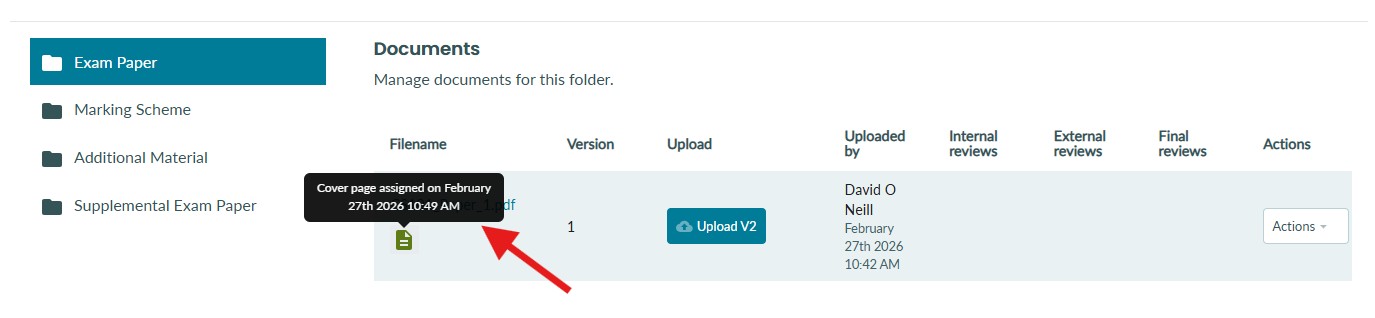
An audit trail event is also logged when a cover page is assigned to a document. This shows who assigned the cover page and when. 
9. You can download an individual PDF of the cover page by selecting the actions dropdown and selecting 'Download cover page'.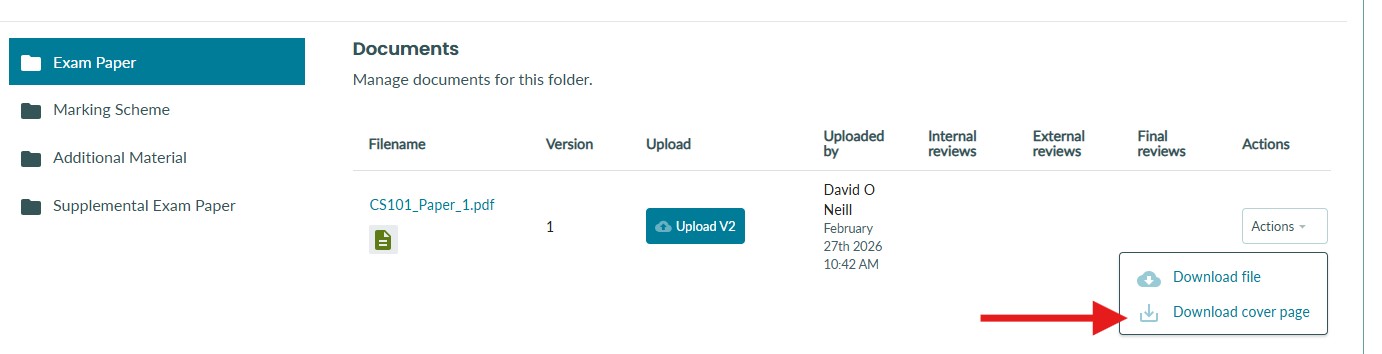
10. When reviewing a document, users are informed that a cover page is assigned to a document and they can switch to the cover page tab. A preview of the cover page will be displayed. They can also download the cover page separately, if required.
Note: If your cover page is a word document and not a PDF, a preview will not be available. You can still download the cover page word document and review it. 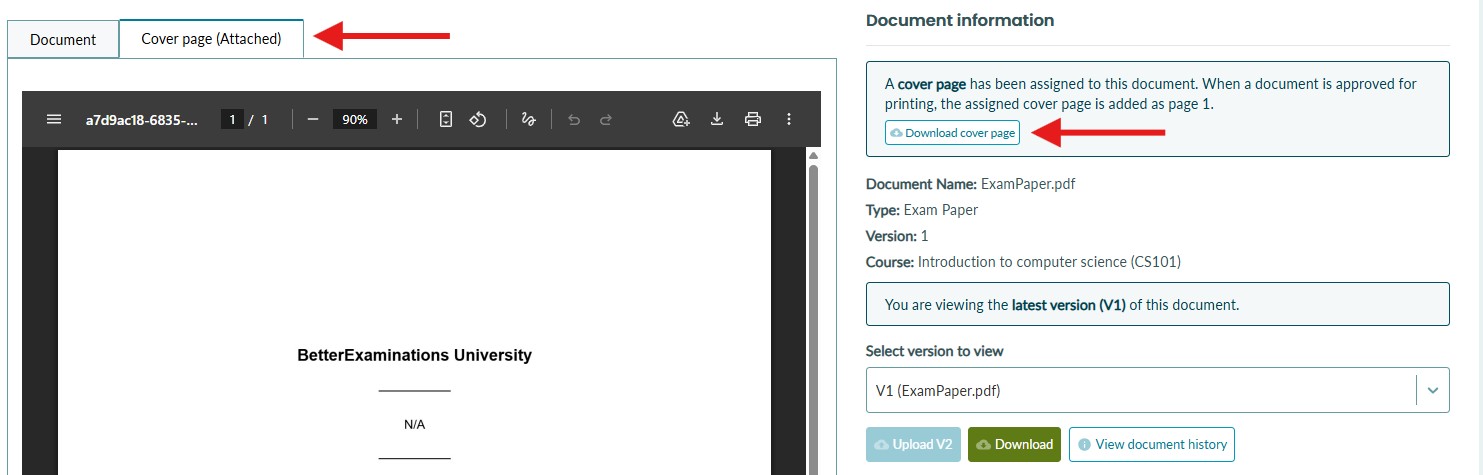
Merging cover pages with assigned documents
Depending on your organisation's configuration, this process may happen at different stages of the workflow. In this example, the cover page is automatically merged with the assigned document once the document is approved for printing (Sent for printing).
During this process, the cover page is added to the beginning of the assigned document. A new document version is then created, containing both the cover page and the assigned document as one single document.
When a document has a cover page merged, a merged icon will appear under the document in the folder list.
Since this new document containing the cover page is system generated, the uploaded by column will display 'Cover page' to differentiate a system generated upload with a user upload.