Getting your uploaded documents approved
How to progress your uploaded documents through the review progress
Dashboard
As a document uploader, when you login to your dashboard you will see a section called 'Your exam document sets'. This area of the dashboard allows you to track the progress of uploaded documents through the review process and identify the actions you need to take.
Before you've uploaded any documents, you should see your courses and exam document sets you are assigned to listed with the next step of 'Upload documents'.
The information displayed on the dashboard here will be updated as your uploaded documents move through the review process.
You can select the exam document set to begin uploading documents. 
Required documents
In a sequential workflow, before sending documents to the first review stage, you must upload all required documents. When you open the exam document set, you will be informed which documents are required to upload. You will notice that the 'Submit' button for the first stage will be disabled until all required documents have been uploaded. 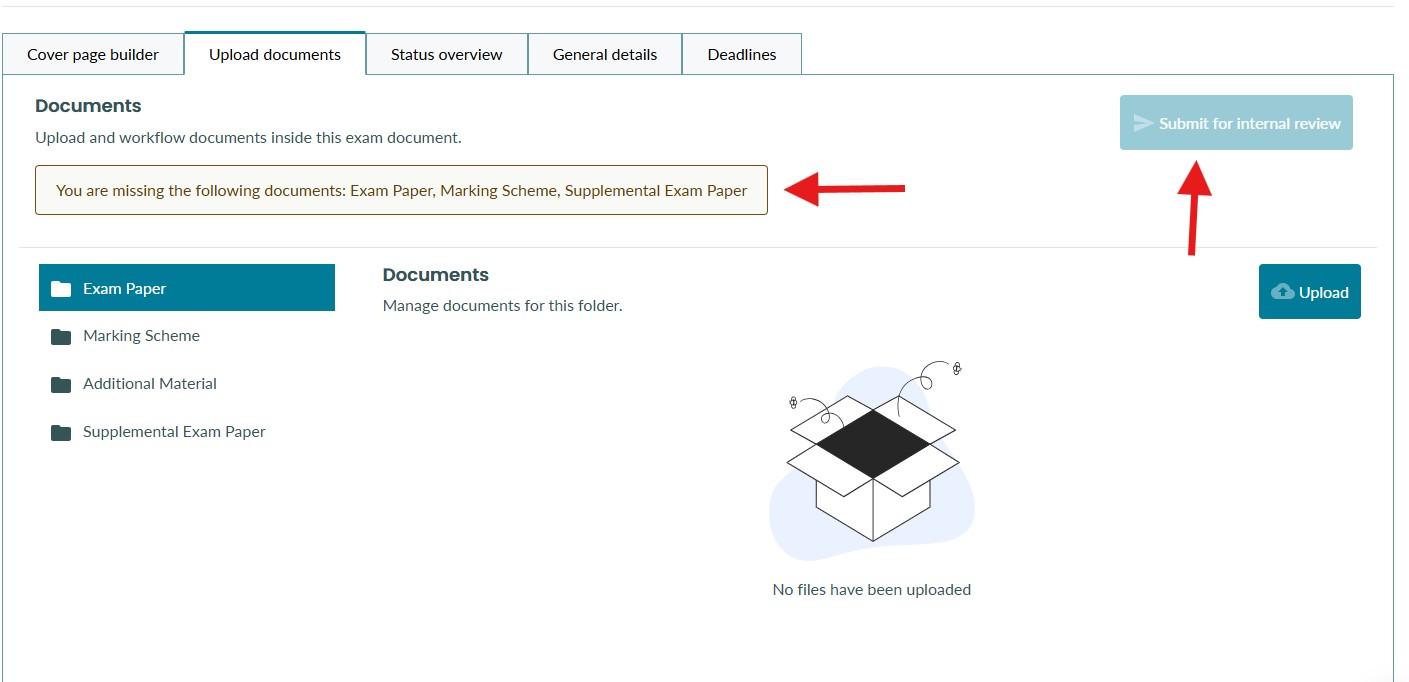
Once all of your required documents are uploaded, you will your dashboard will now inform you that the next step is to send the documents to the first stage of review. In this example, that is internal review.

How to send uploaded documents to be reviewed
Once all required documents are uploaded, you can then start to move the uploaded documents through the review process.
1. To start the review process, select the 'Submit for [stage 1]' button. In this case, the first stage is internal review. 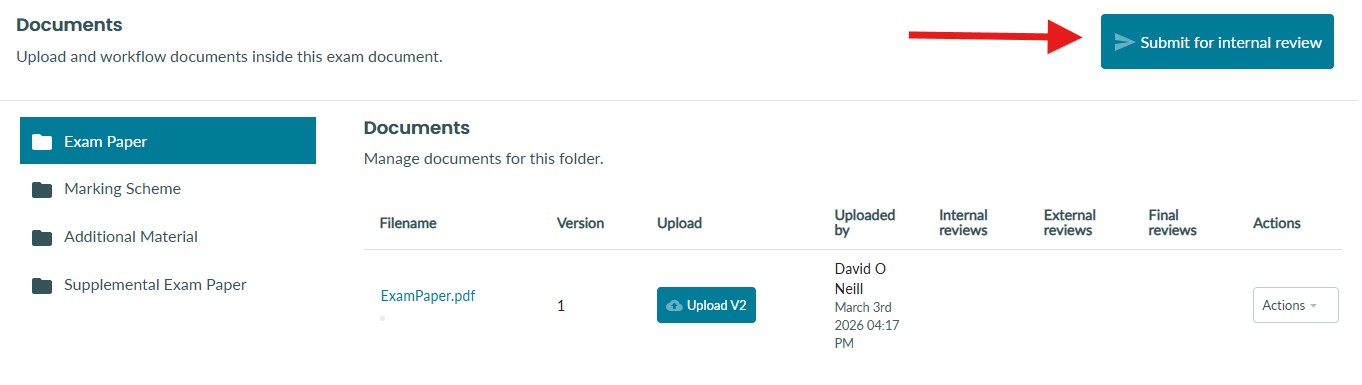
For more information on cover pages, see our cover page documentation.
2. You will be asked to select a reviewer for this stage. Users must be assigned to the course/module with permission to review documents to appear as an option here. See more information on user and course roles here
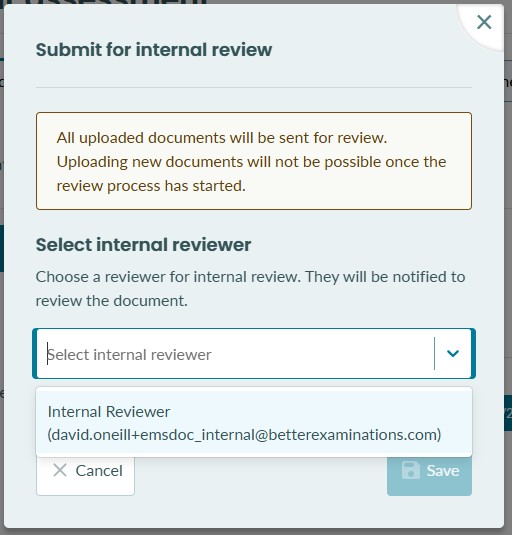
3. The user assigned to review the document will receive an email notification (if configured) to alert them that they have been assigned as a reviewer. These documents will appear on their dashboard for review.
4. Once your documents have entered the review stage, you will notice the following
- All documents are locked, and new versions cannot be uploaded while the document is waiting for review
- The internal reviews column on the document will show an icon to indicate the document is waiting for review
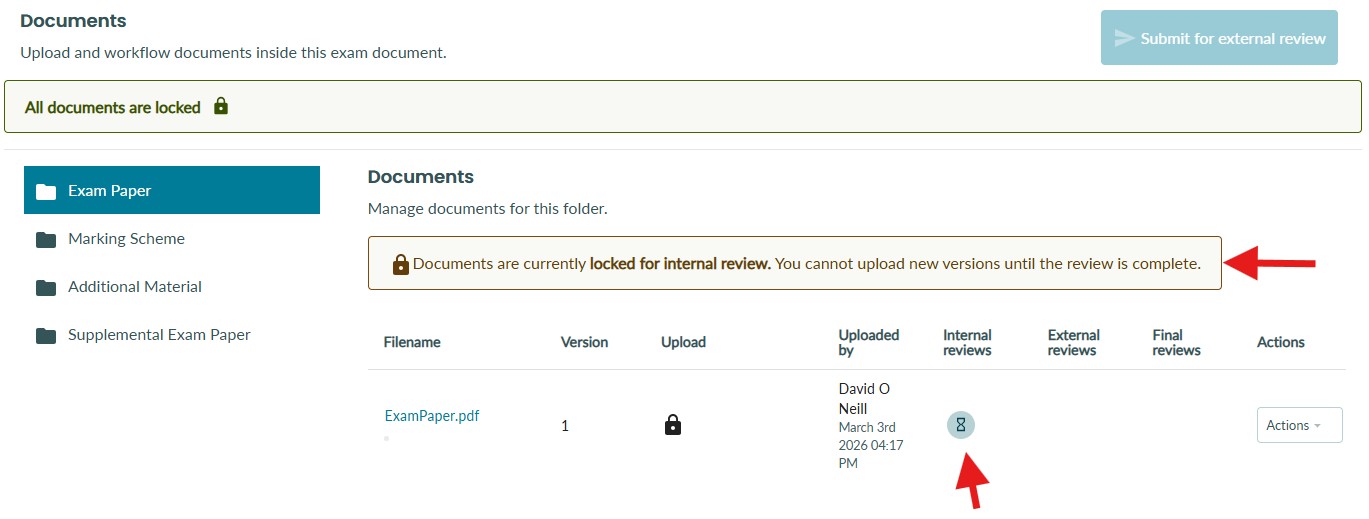
5. You will also see in the document preview page that the assigned reviewer is now shown. 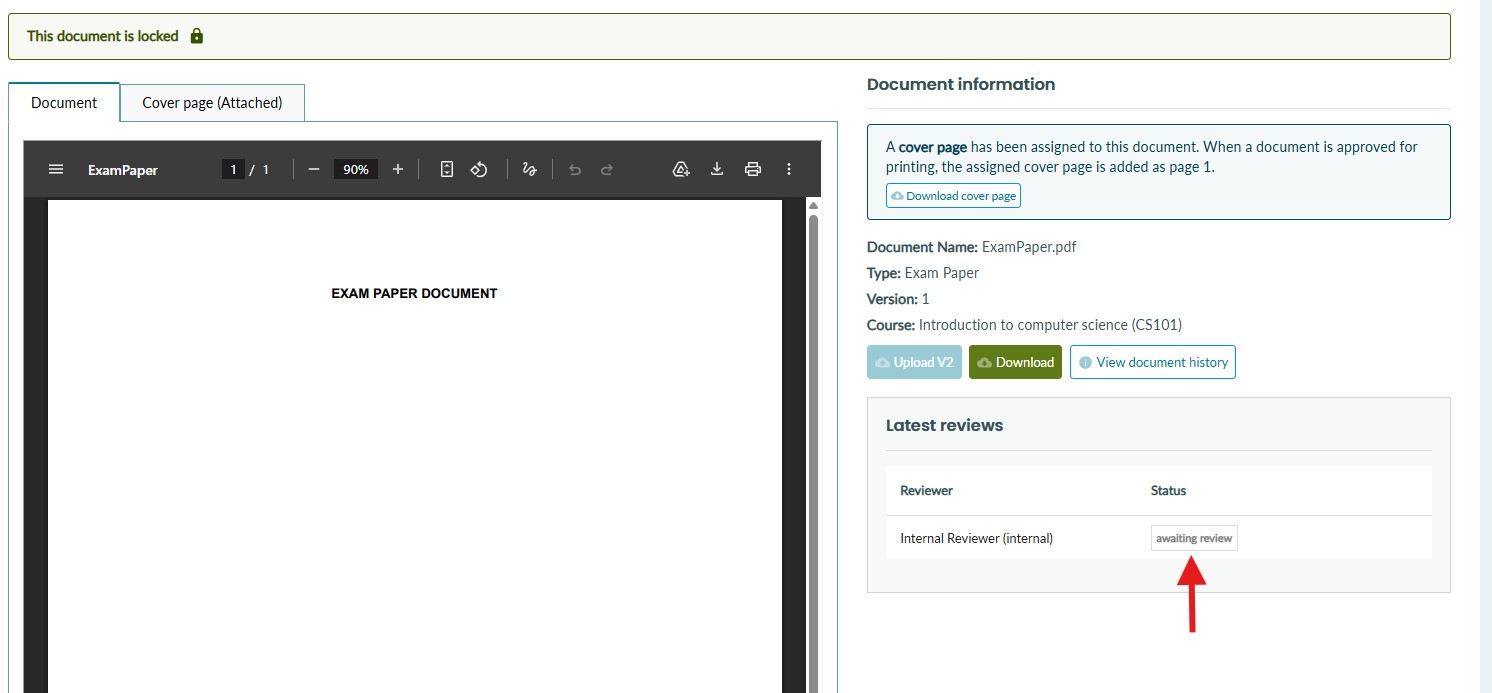
Your dashboard will also be updated with information on the your documents. The next step will now tell you do wait for your reviewer to review your uploaded files.

Review progress
Your dashboard component will update as the reviewer starts to review documents. You can see how many documents have been reviewed, how many are still pending review, and if the reviewer has suggested any changes.
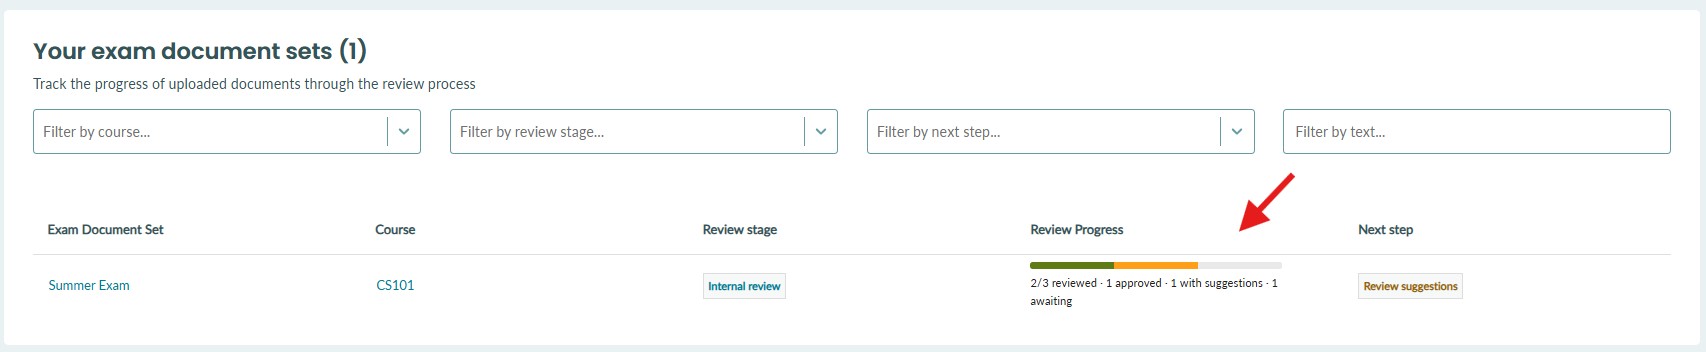
Types of feedback
When submitting a document review, reviewers can have up to three options to choose from:
No changes needed
The reviewer has approved the document, and they do not see the need for any amendments. The reviewer has the option to leave a comment to indicate that they are happy with the document.
Suggest changes
The reviewer is suggesting that you make changes to the document but may not require you to send them for their approval again. They will leave a comment to explain what changes they are asking for. They also have the option of attaching files to the review.
Reject a document
The reviewer explicitly rejected the document and a new version of the document must be uploaded and sent again for review.
How to view feedback from a reviewer
When a review is completed on a document, the status icon under the review stage will change to indicate the result of the review.
If configured, you will also receive an email notification when all documents in a document set have been reviewed by the reviewer.
Below you will see that the reviewer approved the exam paper. You will also notice that the document is no longer locked, and it is now possible to upload a new version of the document. 
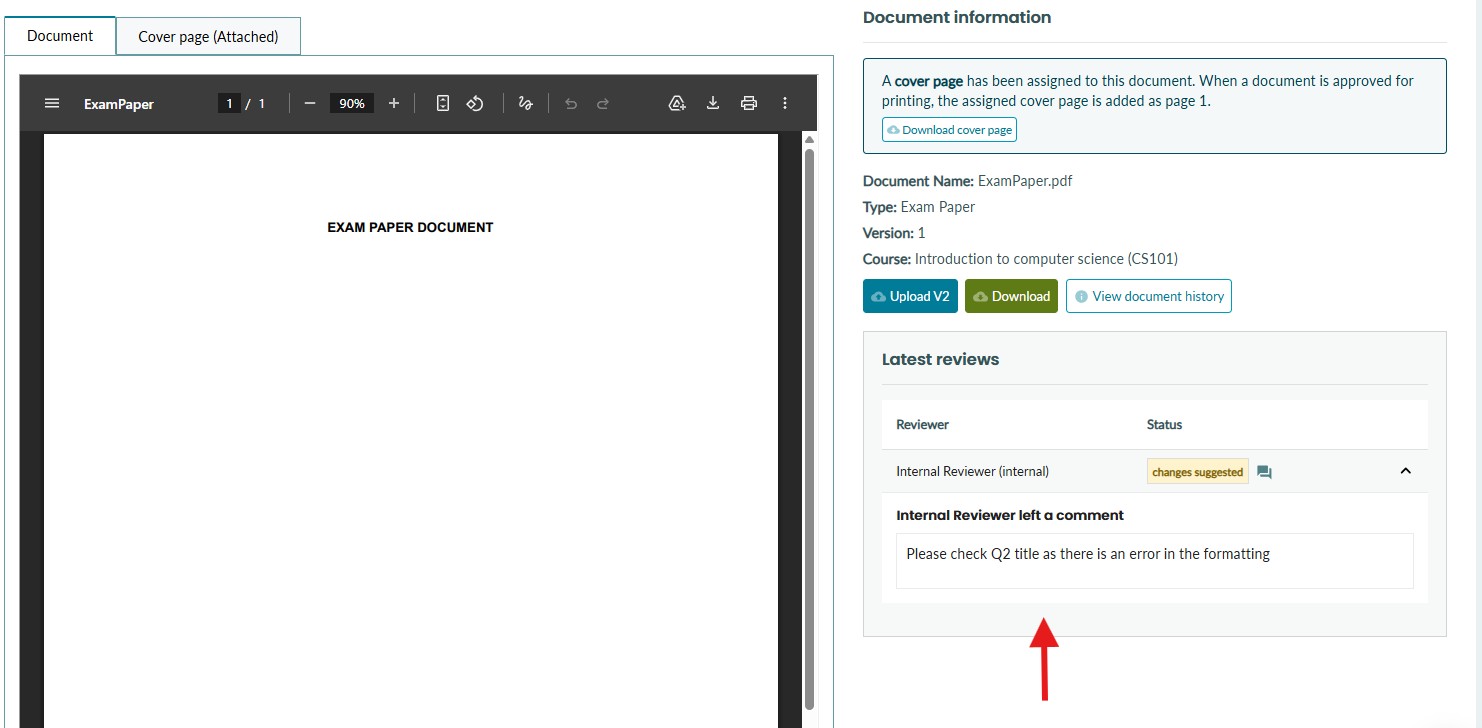
The status of the review, along with any comments left, can be viewed by selecting the document and looking at the reviews table. 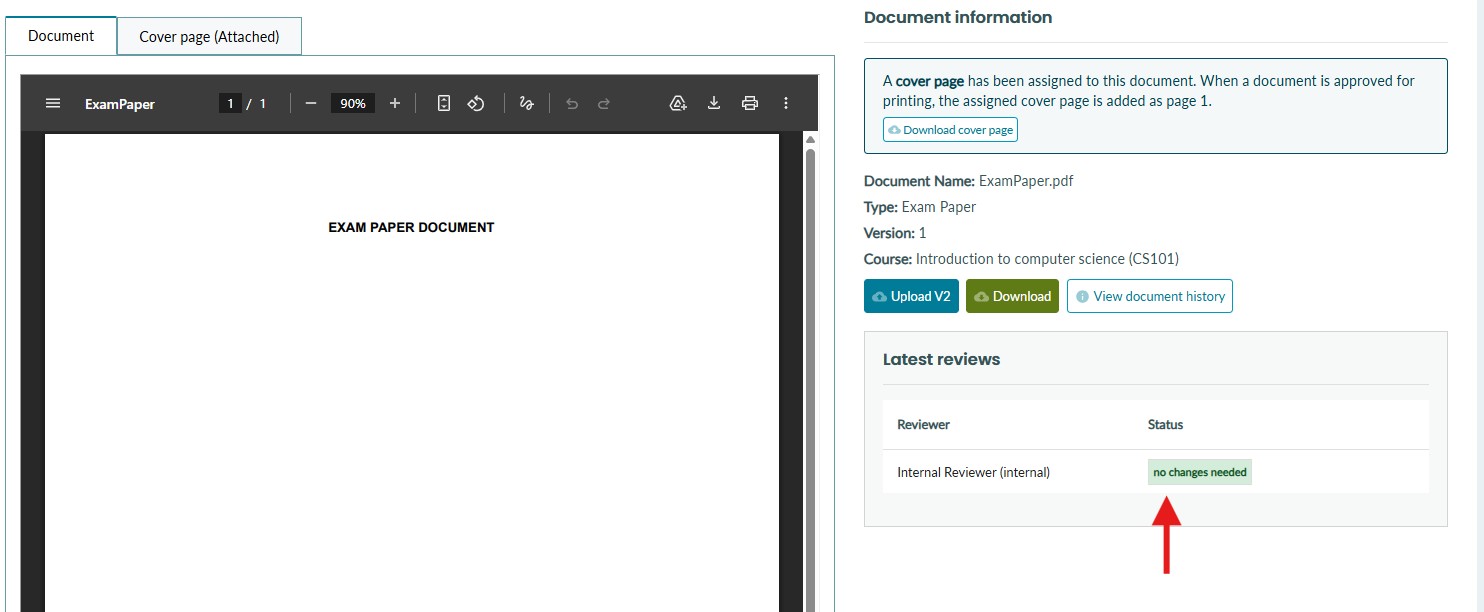
If the reviewer has suggested changes to the document, the status icon on the internal review column will appear as shown below. 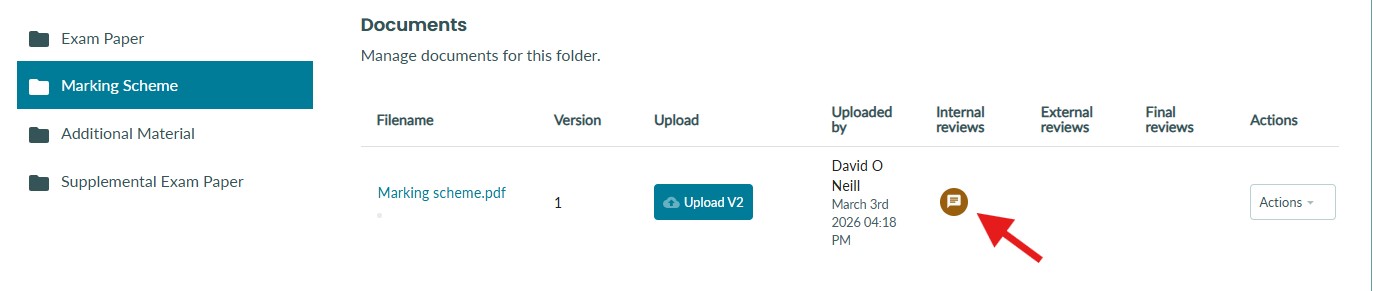
If you select the document, the comments left by the reviewer can be reviewed.
How to address feedback from a reviewer
Depending on the reviewer's feedback and the review options available to reviewers, you may need to take different actions to address reviewer's feedback.
Approved
If the reviewer has approved your document without any comments, there is no further action to take on it and it can progress to the next stage of the workflow (once all other documents are ready).
Addressing suggested changes
If a reviewer has suggested changes on a document, you can review their comments and then upload a new version of the document with those changes included. This will not wipe the reviewer's review or ask them to review the document again. 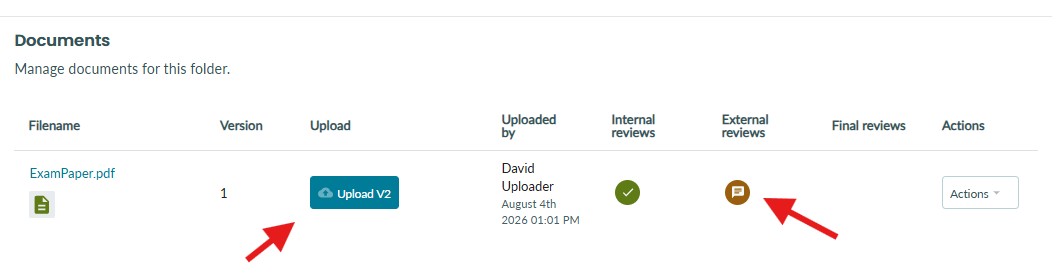
In this example below, you can see the external examiner has left some suggested changes.
1. Once you have made those changes, you can then select 'Upload V2'.
2. Attach your new document. You can add a note to explain that you have addressed the feedback from the external.
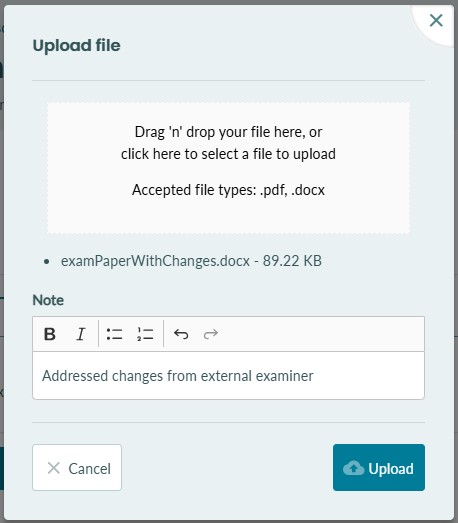
3. You will see that a new version of your document is uploaded and the review from the external has not been reset. This means they will not be asked to review it again. 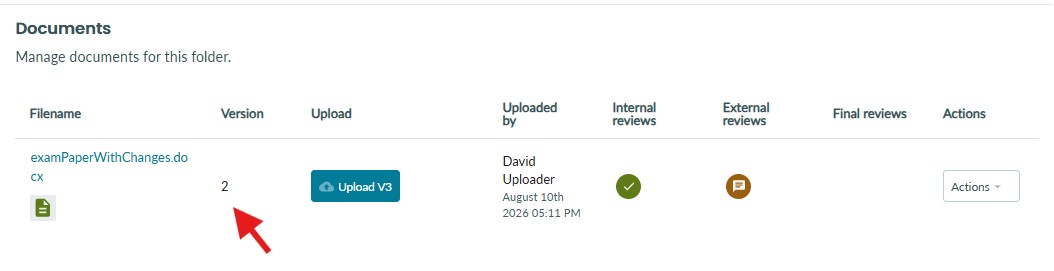
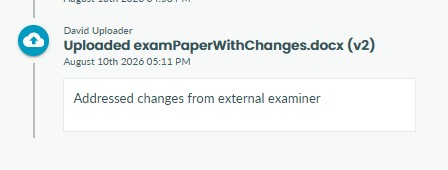
4. Your note that you have addressed the changes will also been shown in the document history (audit trail) for any future reviewers or administration to see.
Addressing reject documents
If your reviewer has the option to reject a document and request to re-review it once changes has been made, you will see a rejected status in the document reviews (as shown below).
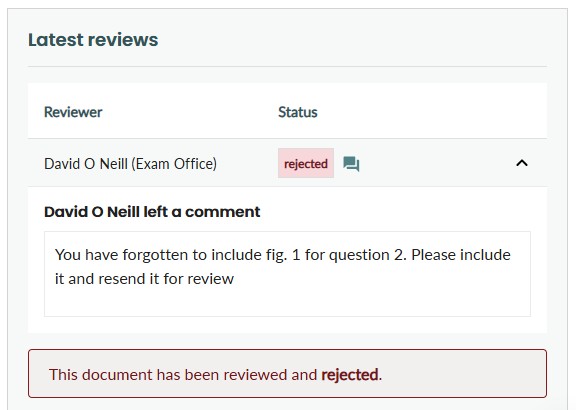
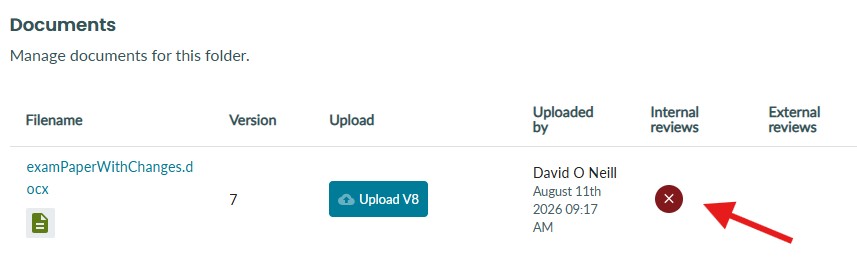
In this example above, you can see the internal reviewer has rejected a document.
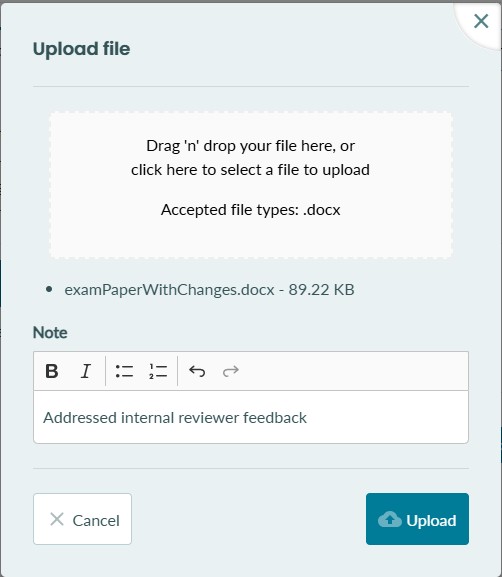
1. Once you have made the necessary changes, you can then select to upload a new version.
2. Attach your new document. You can add a note to explain that you have addressed the feedback from the internal reviewer
3. The review on the rejected document will be removed and reset.
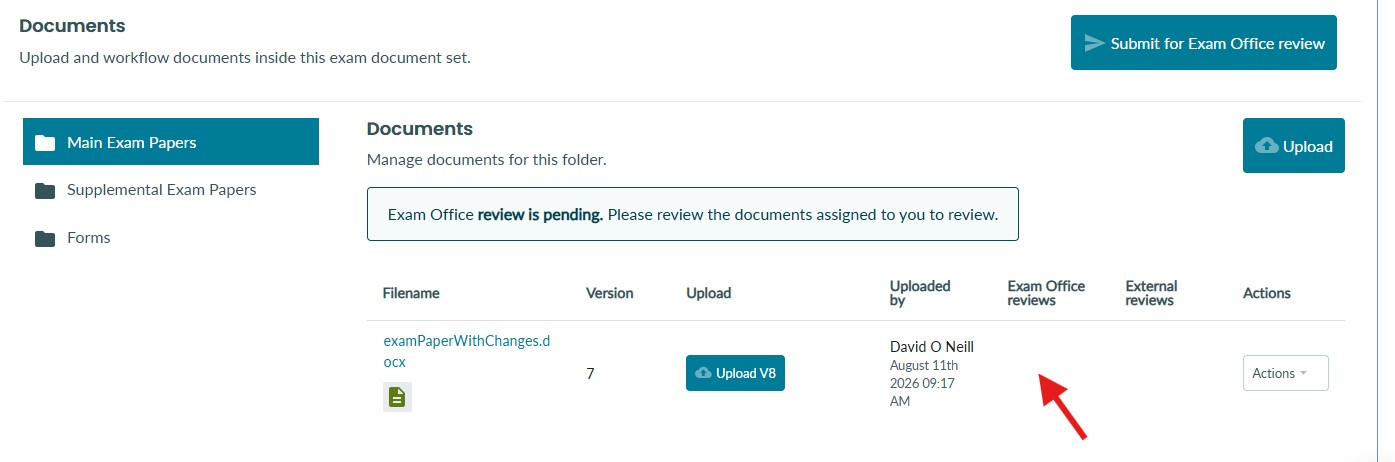
Before submitting documents back to be reviewed again, make sure you have uploaded all updated documents. You must submit all updated documents in once action.
Once you have uploaded all updated documents, you can then send the documents back for review again.
Only documents that were previously rejected will need to be reviewed again. Documents that are already approved will not need to be reviewed again.
To send rejected documents back for re-review, select the Submit for review button. In this example, we are sending the rejected document back to the exam office for another review.
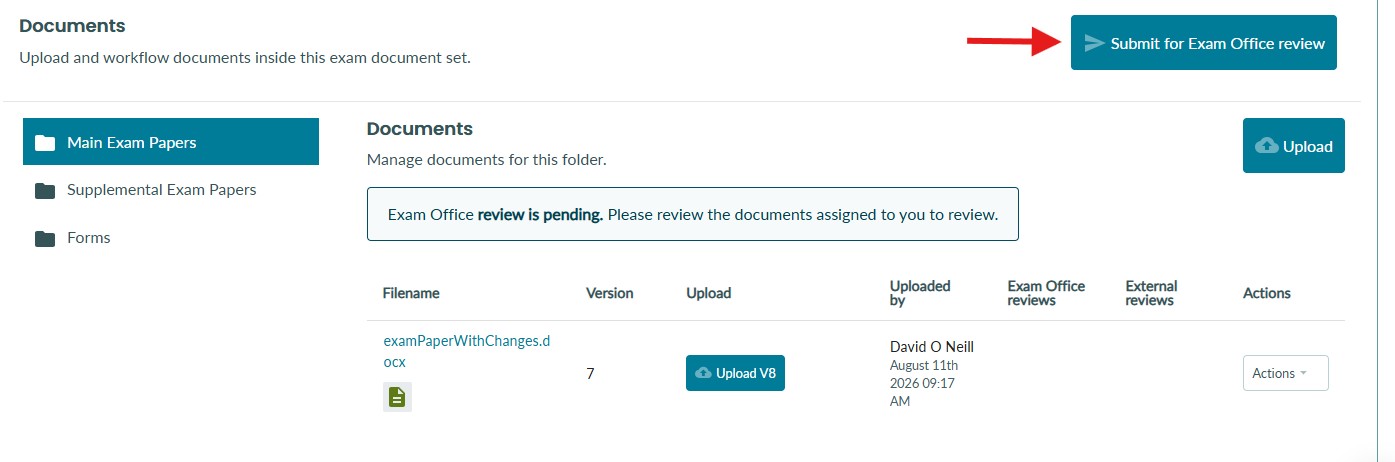
You will now see the document is pending review again.