
How to Approve Documents for Printing
How to approve documents for printing
Overview
Approving documents for printing confirms they are finalised and ready to be sent to print. Once approved, documents are locked and no further versions can be uploaded.
Not all documents that are uploaded will be printed. This means that some documents may not be approved for printing.
To approve documents for printing
-
You must have the Approve for Printing permission on the course. Contact your system administrator if you do not have access.
-
If your organisation uses cover pages and your document requires a cover page, one must be assigned to the document before it can be approved for printing. If a cover page is missing, you will be prompted to go to the Cover Page Builder before proceeding. You may be required to upload cover pages before sending for review.
Depending on your organisations workflow, you will either individually approve documents for printing or send all documents in one go for printing.
Approve a single document for printing
If your organisation configuration allows it, you can individually approve specific documents for printing.
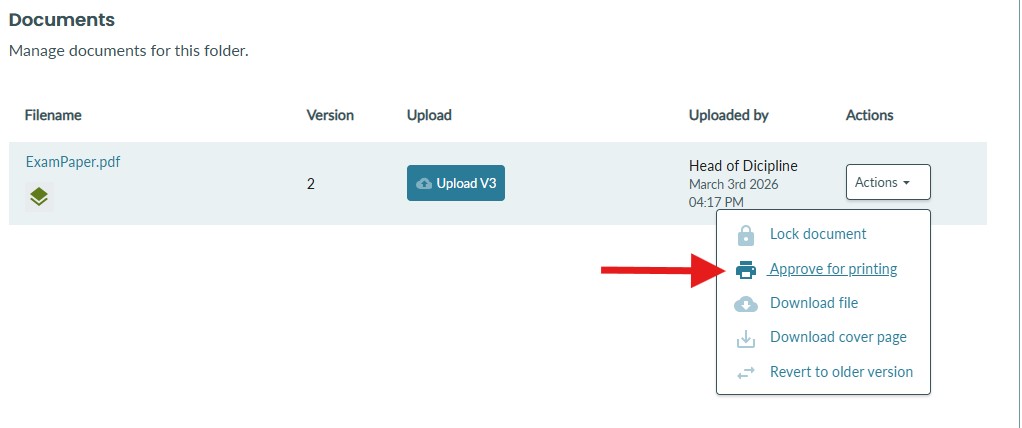
From the document list:
-
Navigate to Courses/Modules and open the relevant course.
-
Click Exam Document Sets and open the exam document set.
-
Go to the Upload Documents tab.
-
Find the document you want to approve.
-
Click the Actions dropdown for that document.
-
Click Approve for printing.
-
Review the confirmation dialog and click Confirm.
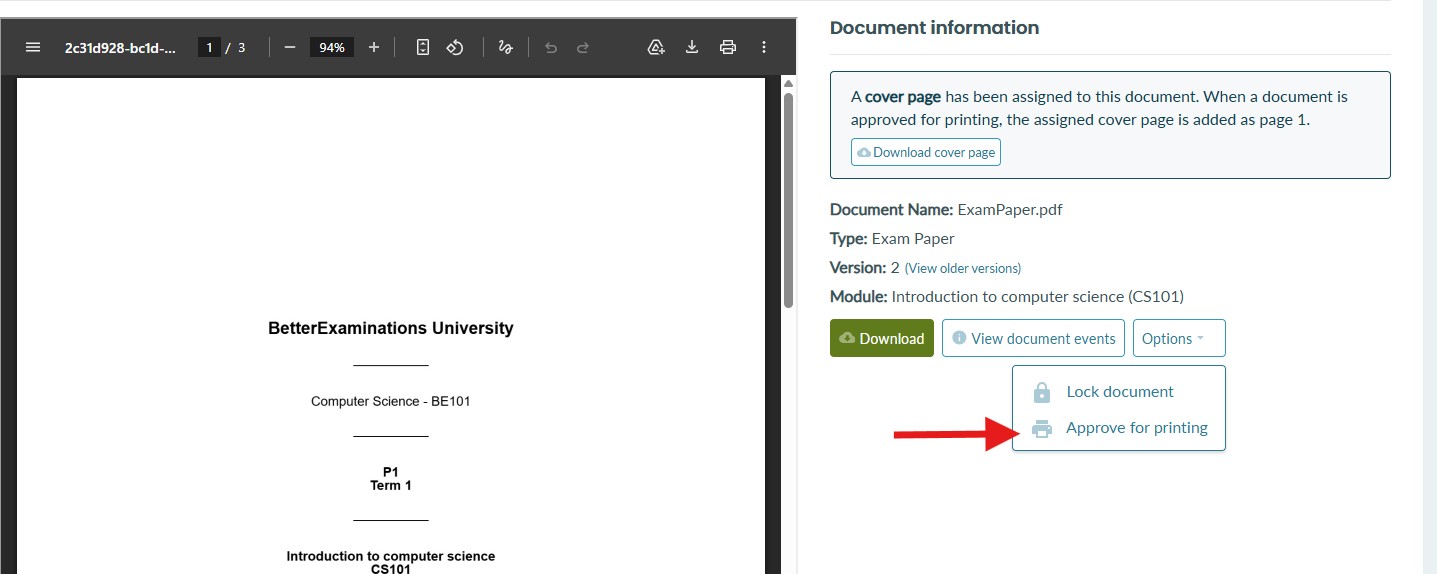
From the document review page:
-
Click the document filename to open it.
-
Click the Options dropdown.
-
Click Approve for printing.
-
Review the confirmation dialog and click Confirm.
Submitting your document set for printing
In some organisations, documents move through review stages as a group. Printing approval is the final step, triggered by clicking Submit for printing once all required reviews are complete.
-
Navigate to the exam document set and go to the Upload Documents tab.
-
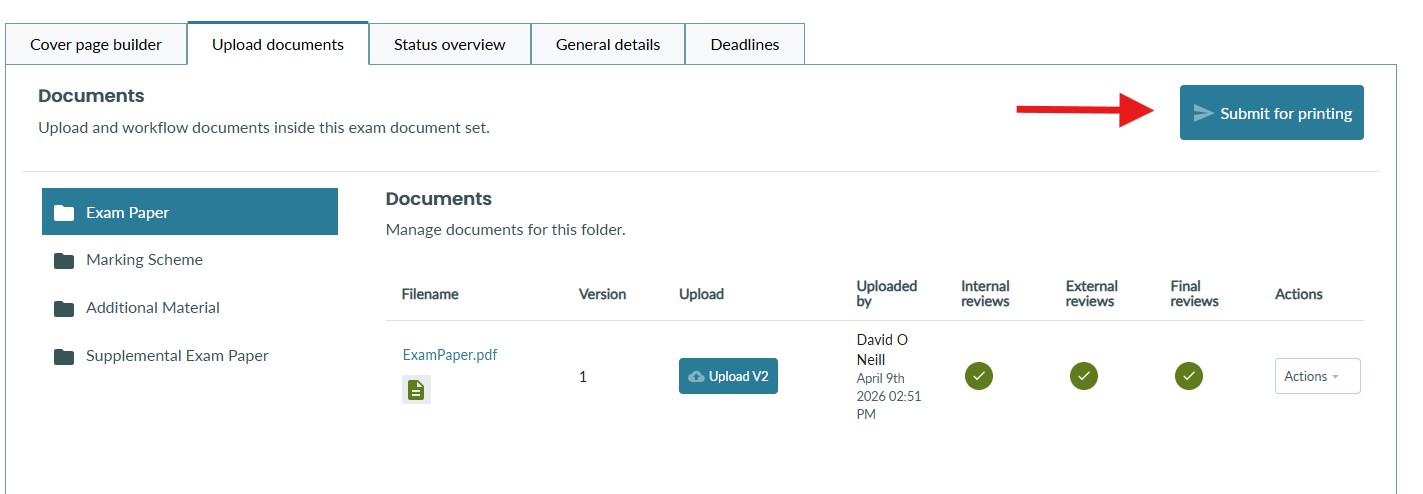
Once all review stages are complete, the Submit for printing button will become available at the top of the page.
-
Click Submit for printing.
-
If any documents are missing cover pages, a warning will appear listing the affected documents. Make sure to assign cover pages before proceeding.
-
Click Send for printing to confirm.
The Submit for printing button approves all documents in the exam document set at once.
What happens after approval
-
Approved documents are locked - no further versions can be uploaded.
-
A print icon appears next to each approved document in the document list.
-
Documents become available for download by your print team via the Print Jobs page.
-
You can check the approval status of all documents in the Status Overview tab.
Notes / Tips
-
If your organisation uses cover pages, the cover page is automatically merged as page 1 of the document when it is approved for printing.
-
Use the Status Overview tab for a quick summary of approval status across all documents in the exam document set.