
Using an external marker on an exam sitting
Assign an external marker and send submissions to be checked
Overview
Some exams require an external marker to review all or a subset of submissions after internal marking is complete. BetterExaminations allows you to assign an external marker to an exam sitting and select which submissions are sent for external review. Once marking is complete, you can view and export both internal and external marks for comparison.
Permission notice: To manage marking options, you must have a course role with the 'Modify course settings' permission (Usually for course administrators).
Creating an external marker course role
External markers will, at a minimum, need to be assigned to a course role with the following permissions
- View exams
- View exam results
- Mark exams
To learn how to create and assign course roles, see Managing course roles
How to assign an external marker to an exam sitting
You can assign an external marker to an exam sitting either before, during, or after the exam has taken place.
1. Navigate to the exam sitting
2. Select the Marking options tab
3. Toggle edit mode
4. Toggle on 'Assign an external marker'
5. Select 'Assign external marker'

6. Select your external marker from the list. If the marker is not appearing, make sure they are assigned to the course with a course role that has permission to mark. Confirm your selection. 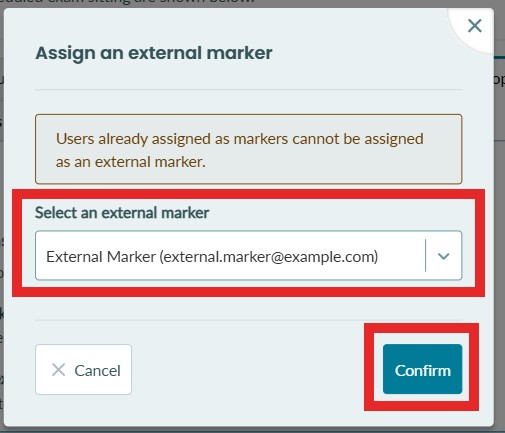
7. You will now see a table showing the external marker.
Remember to click Save to save the new marking settings.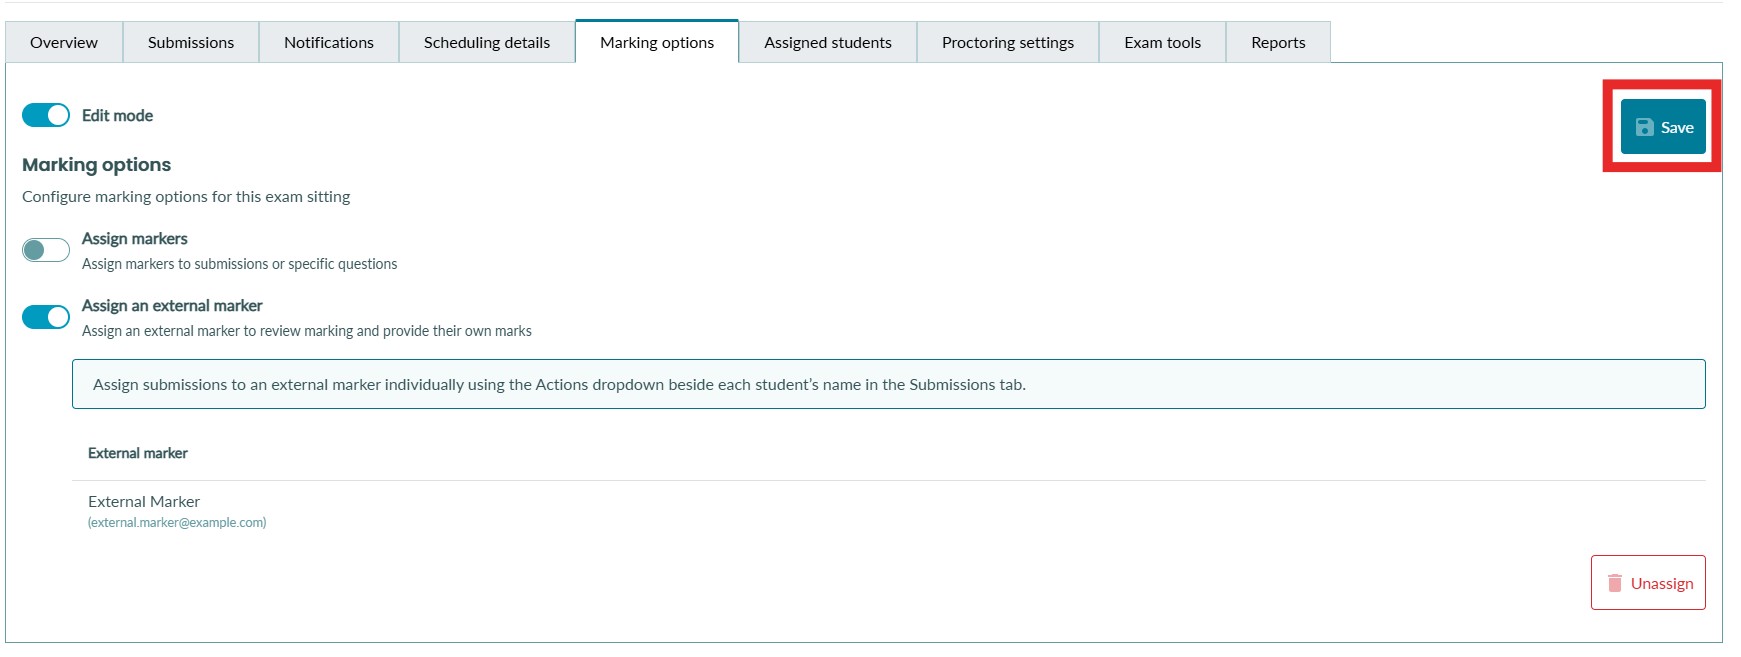
Sending submissions to the external marker
When an external marker is assigned to an exam sitting, any submission that has the status 'Marking complete' can then be sent to the external marker for review. Once users have permission to mark an exam, they will have permission to send the submission to the external marker.
To send a submission to the external marker
1. Navigate to the exam sitting submissions list
2. Select the 'Actions' dropdown option on the submission
3. Select 'Send for external review' 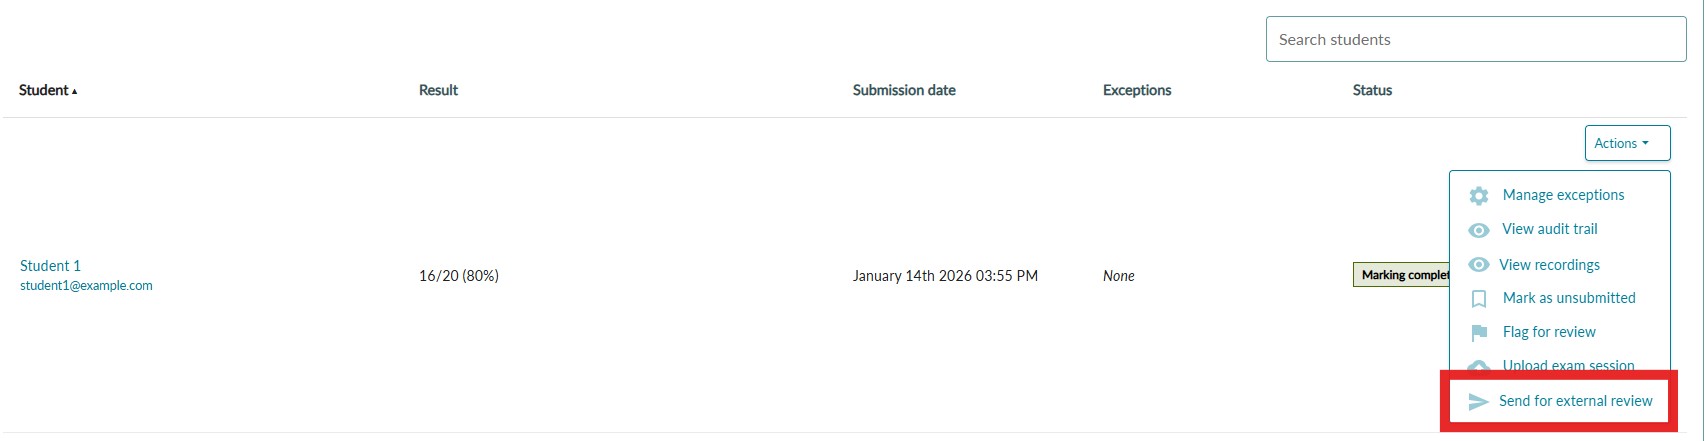
4. You will be asked to confirm your action. Select 'Send for external review' to confirm and make the submission available to the external marker. 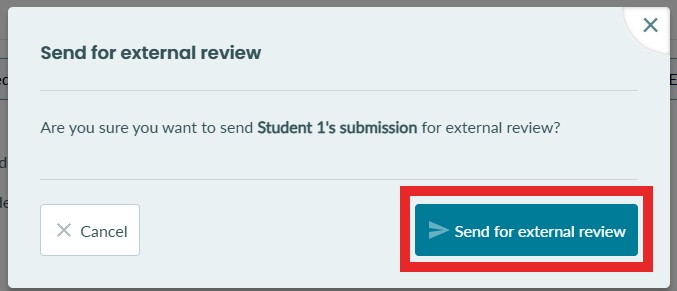
Viewing sittings awaiting marking as an external marker
External markers can easily access the submissions assigned to them by navigating to the marking dashboard. This is the quickest way to know what work needs to be done by the external marker.
1. Log in as an external marker and select the 'Marking' option located in the main menu. 
2. External markers will now see a table containing all exam sittings with submissions awaiting their marking. They can filter by exam sitting, exam, or course.
The number of submissions marked out of the total assigned in an exam sitting is available to the external marker, so they can easily track their progress.
Only sittings with submissions awaiting marking will show here. Once all the assigned submissions in a sitting have been marked by the external marker, the sitting will disappear from this table. This keeps the table clean and only shows external markers what work they need to do. 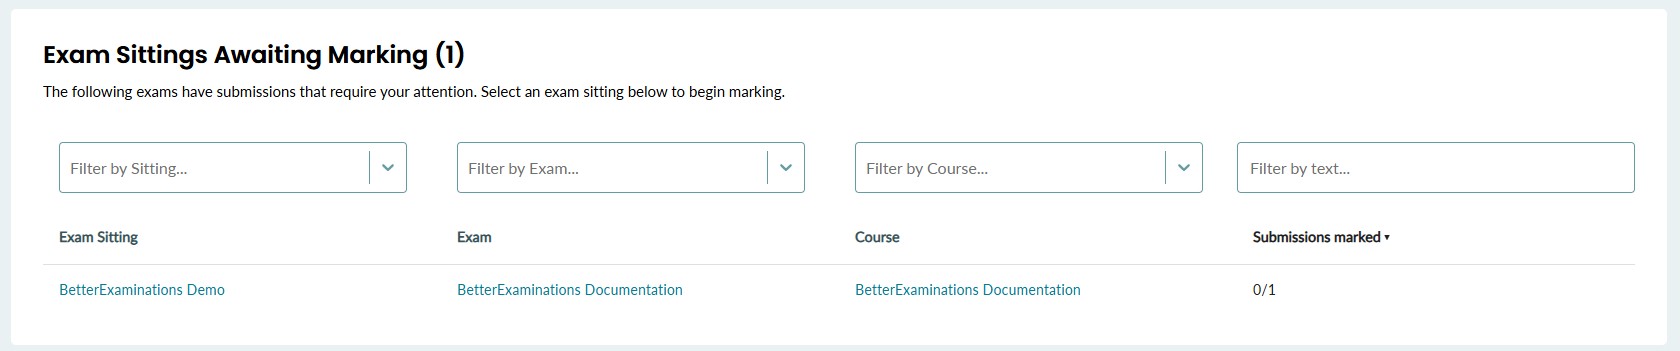
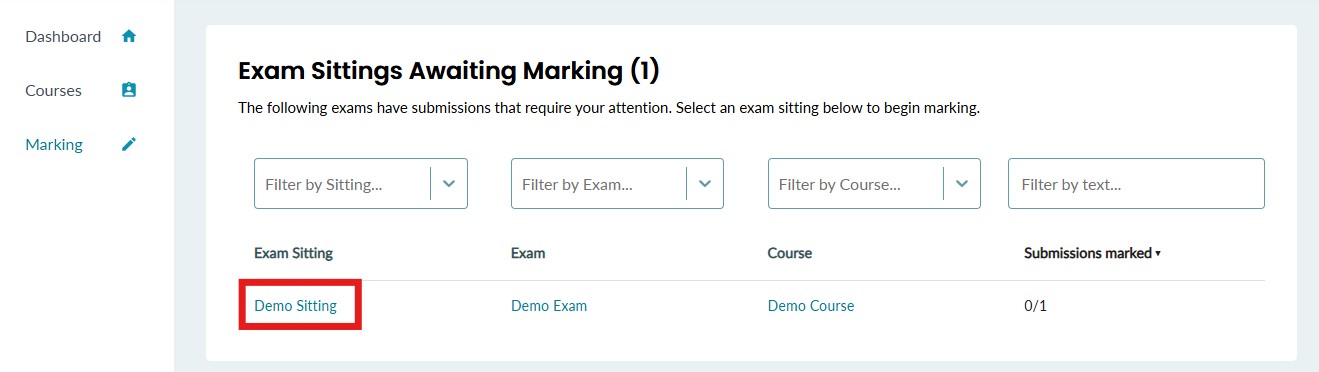
3. By clicking on the exam sitting name, external markers will be brought directly to the submissions list for that exam sitting and can begin reviewing submissions.
Marking an exam as an external marker
Step-by-Step instructions
1. Log in as an external marker and select the 'Marking' option located in the main menu.
2. Select an exam sitting from the marking page
3. The external marker will be brought to see a list of submissions on that exam sitting. The external marker will be informed that they have been assigned as an external marker. They will only see submissions that have been assigned to them.
Each submission will show a review button and will begin with the status 'Awaiting external review' as shown below.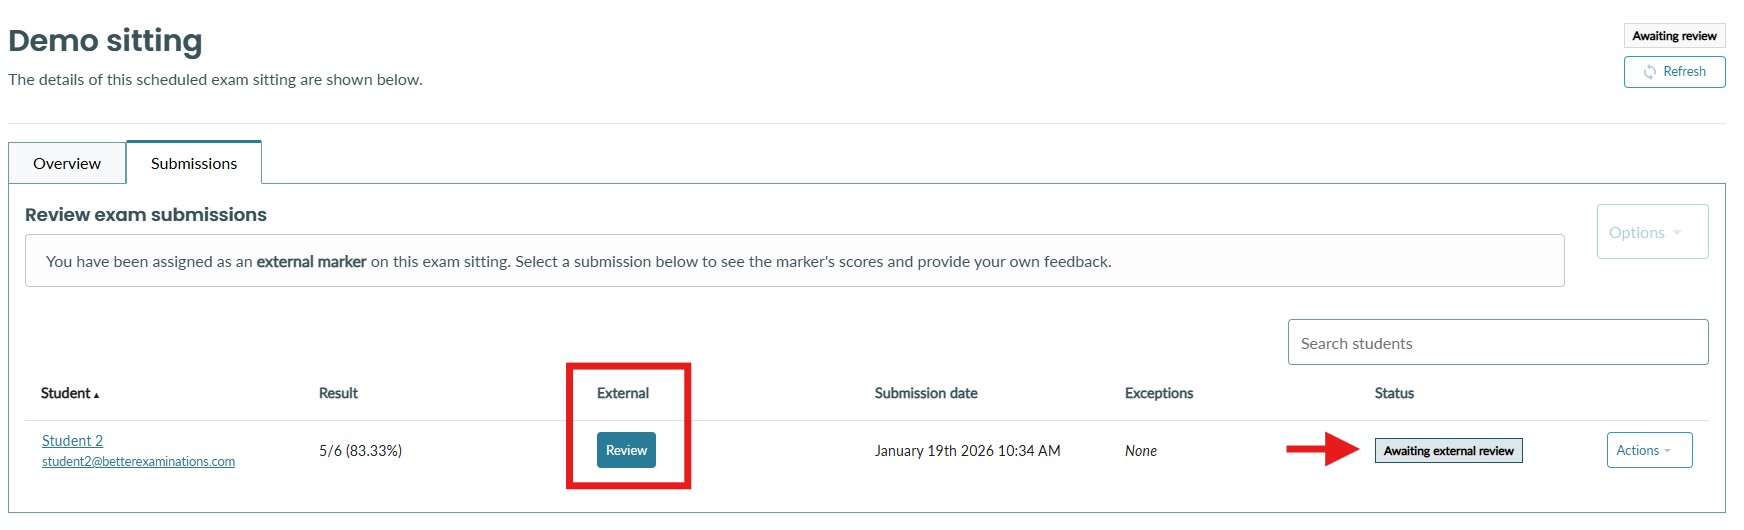
4. To start marking, the external marker can select the 'Review' button on the submission or select the student from the table.
5. When marking as an external marker, each question has an 'External marker' tab.
This tab, highlighted below, will show the external marker the score that was given by the internal marker for each question.
By default, the external marker score will be set to agree with the internal marker.
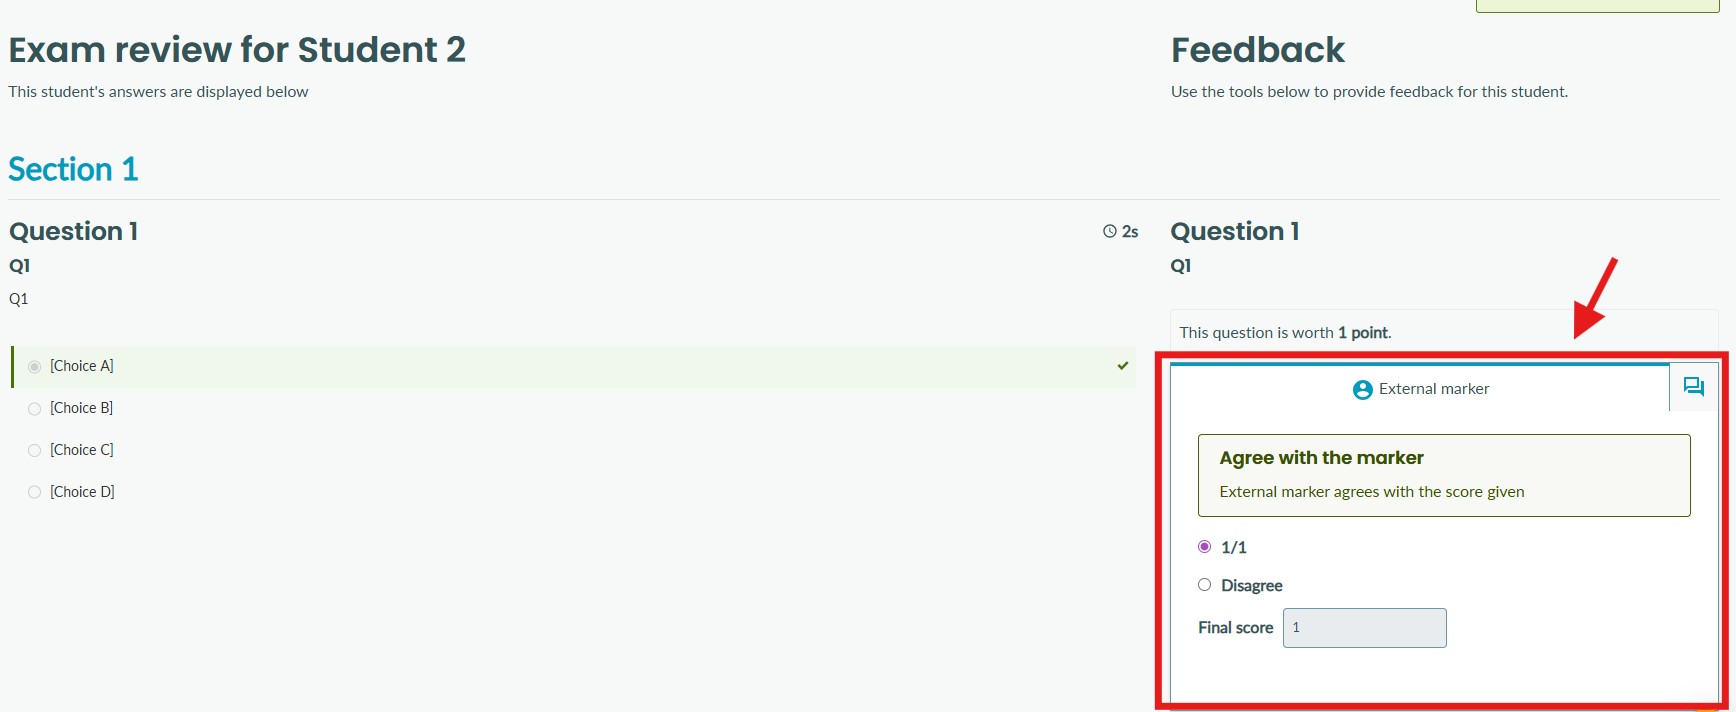
6. To set a score as an external marker, there are two options
Agree with the internal marker: If the external marker agrees with the score given by the internal marker on a question, they do not need to make any changes. They can keep the default selected score.
Disagree with the internal marker: If the external marker disagrees with the score given by the internal marker on a question, they can select the disagree option and set their own score as shown below. 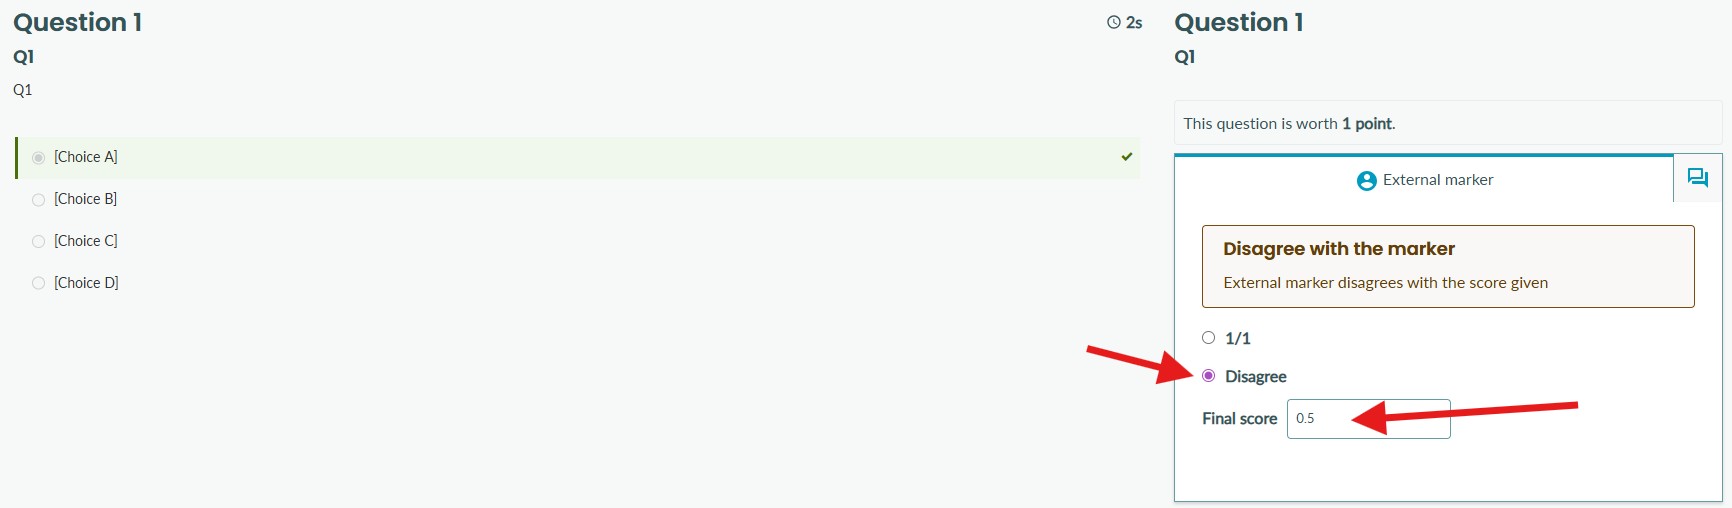
7. External markers can view any marker feedback left to the student by the internal marker. To view feedback, select the marker's feedback tab as shown below. The external marker will be informed if no feedback was left by the marker.
Note that the marker's identity is not revealed to the external marker. 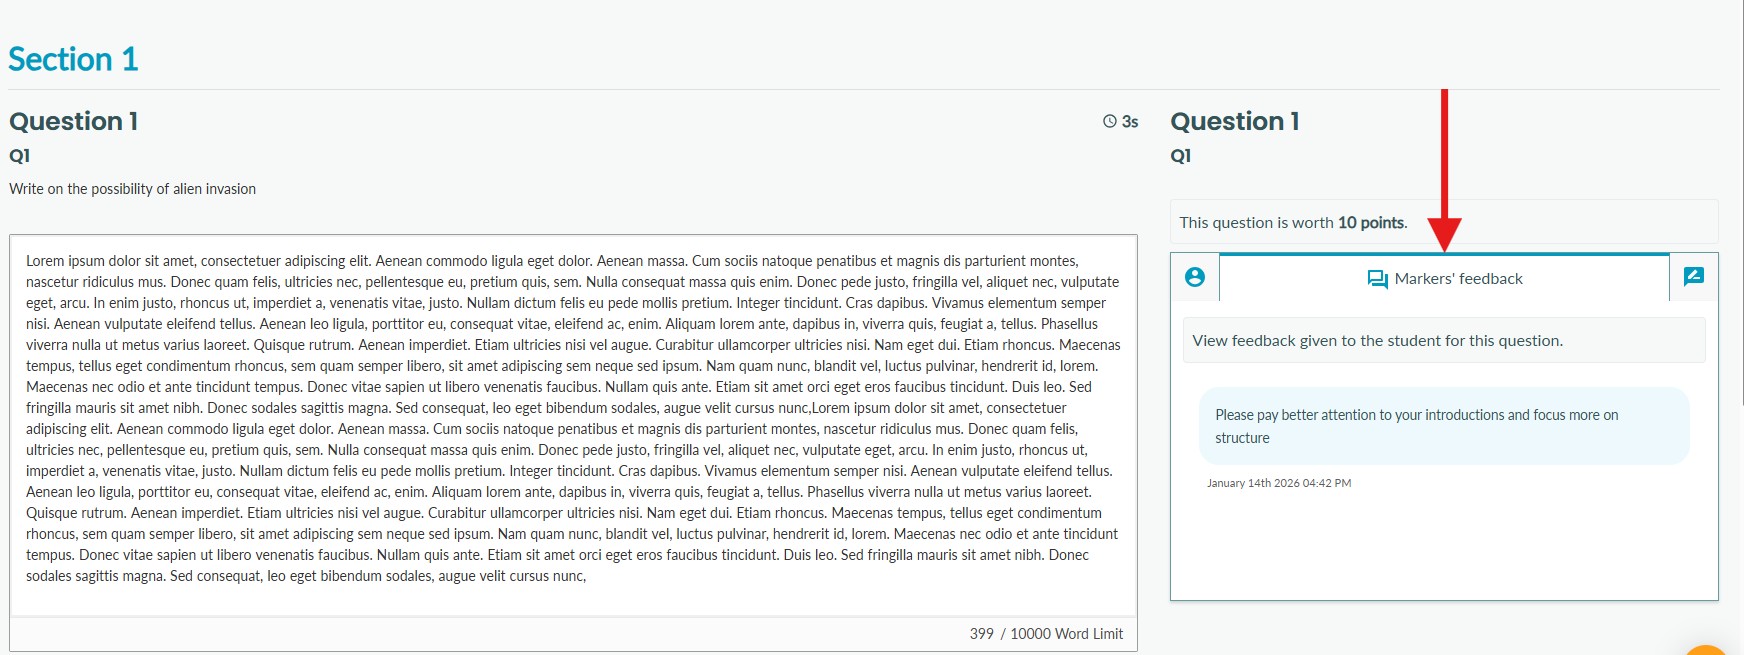
8. External markers can also view the marker's annotations. To view annotations, select the marker's annotations tab as shown below. The external marker will be informed if no annotations were left by the marker.
Note that the marker's identity is not revealed to the external marker. 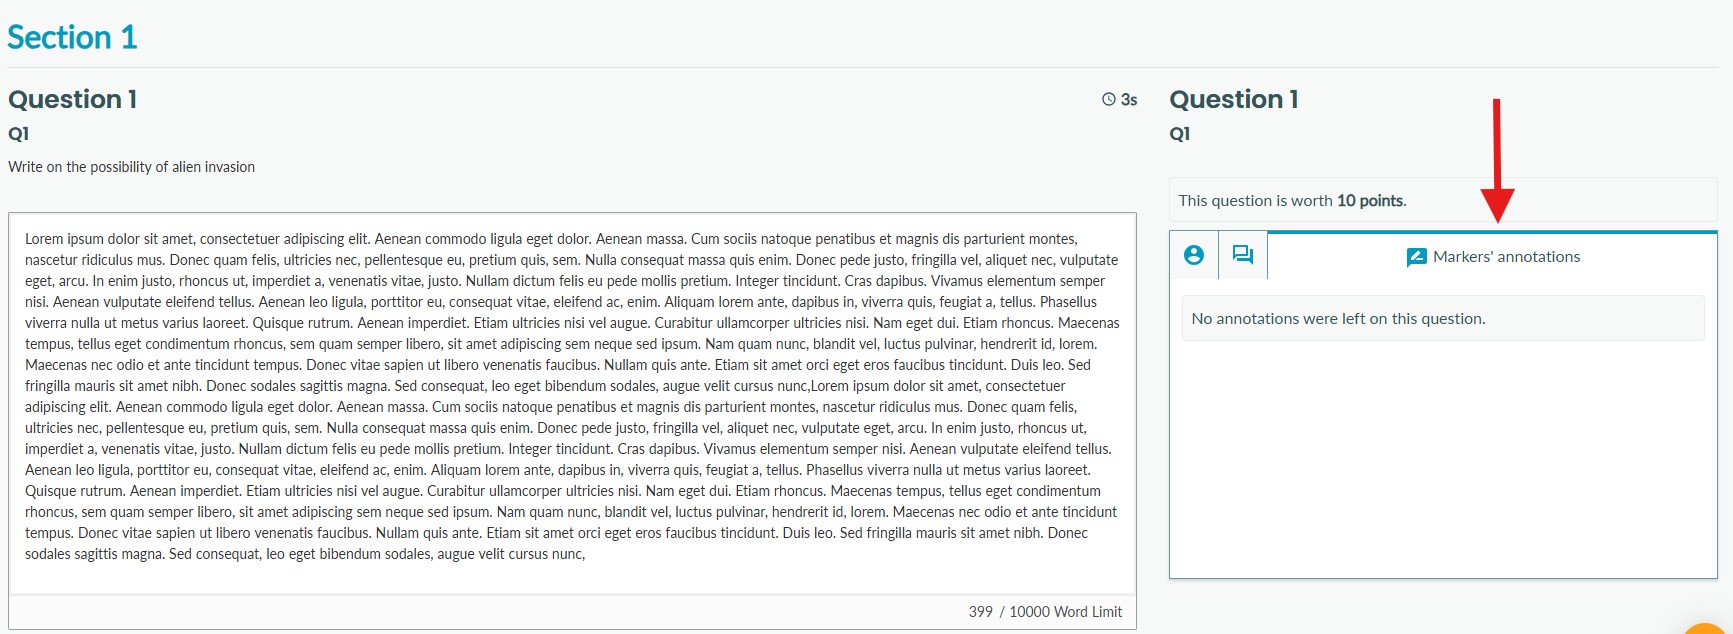
9. If a rubric was used to score the question, external markers can view the marker's rubric scores. To view the rubric, select the Rubric scoring tab as shown below.
Note that the external cannot score using the rubric. They can only view the marker's criteria selection. 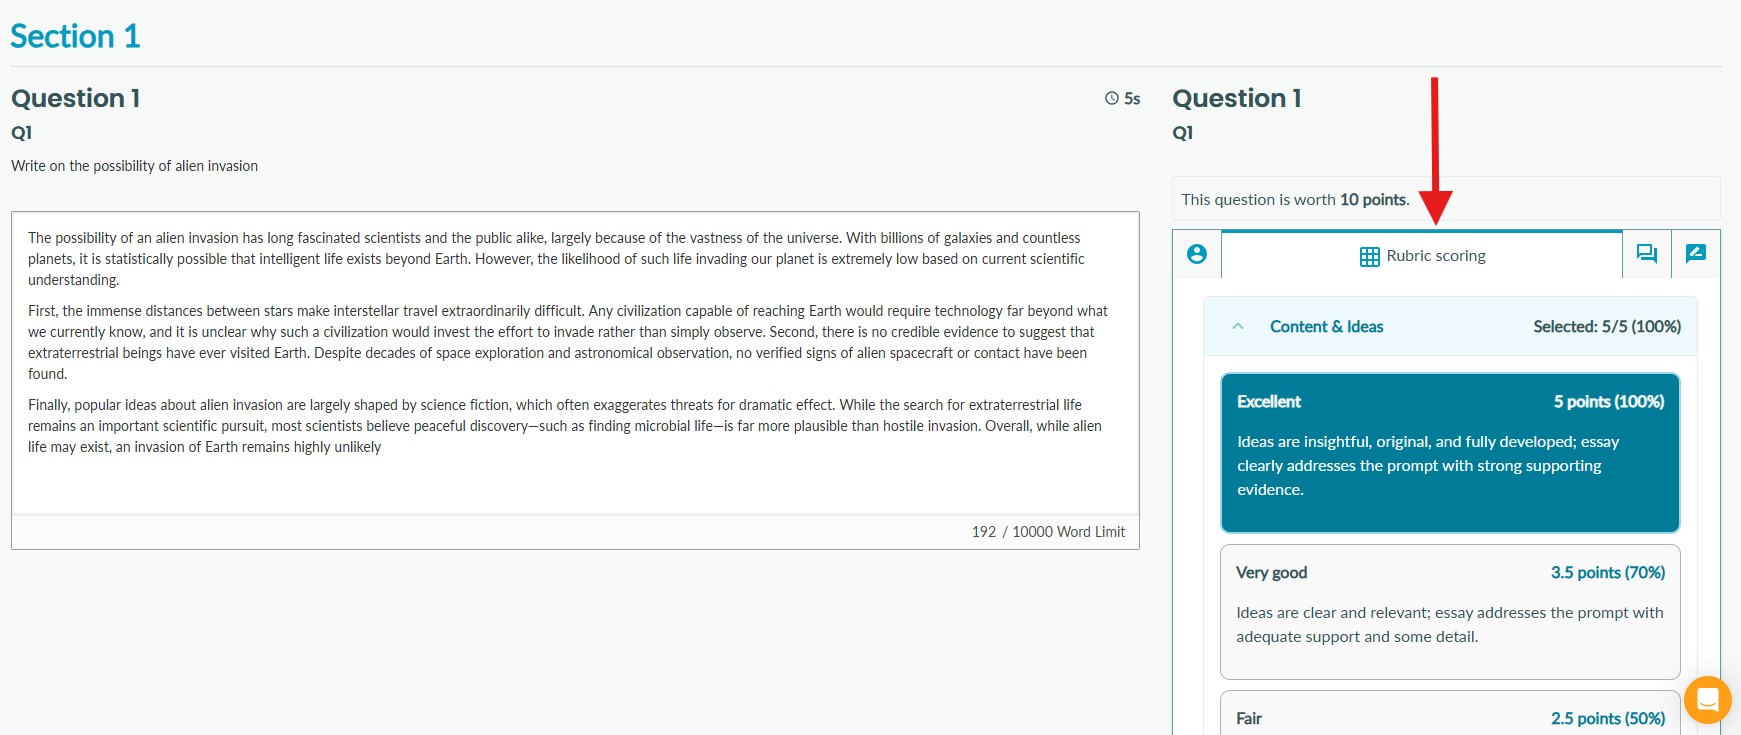
10. The external marker can save marking progress by selecting 'Save' in the top right-hand corner of the screen at any point. If they are not finished marking the submission, the 'External review complete' checkbox should remain unchecked. 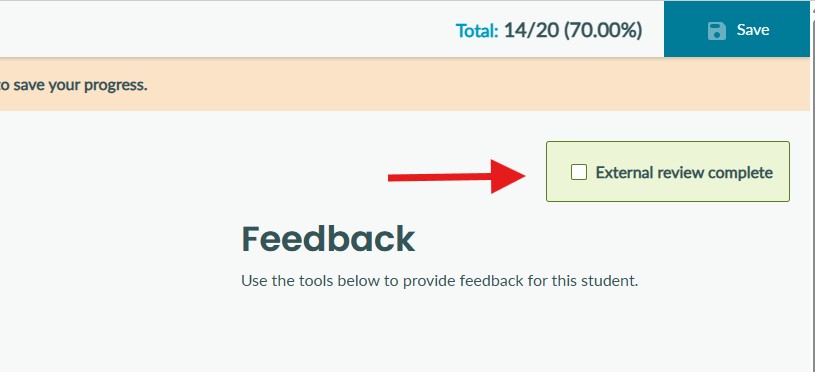
If the external marker saves progress without checking 'External review complete', the status of the submission will change to 'External review in progress' for all users.
The external marker will see a 'Continue review' button on the submission. 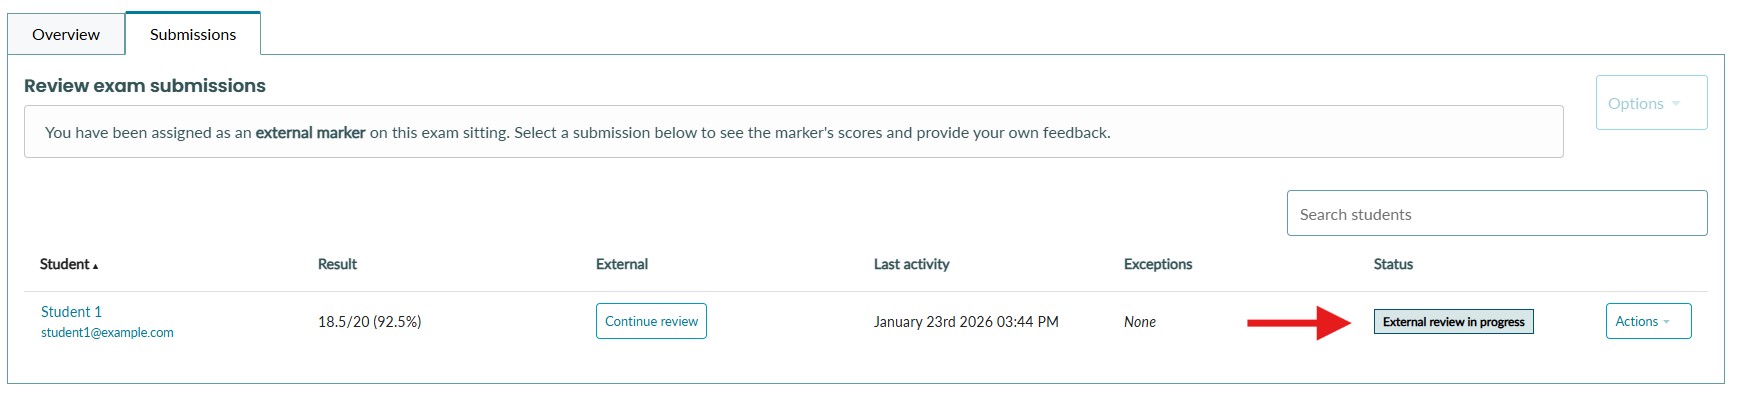
For all other users, at this point, the external markers score will appear in the External column. 
11. Once the external marker is finished with the review of the submission, they can check 'External review complete' and click Save. 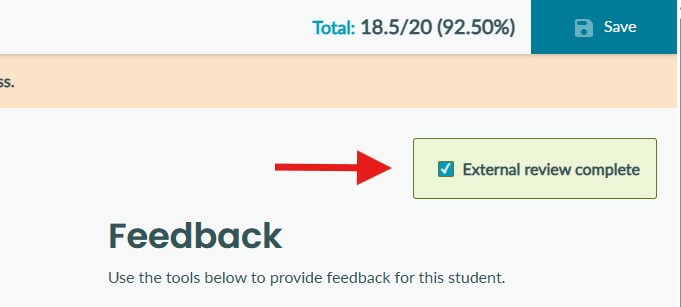
12. The status of the submission will change to 'External review complete' for all users. 
Submission statuses for marking with an external marker
The following statuses apply to submissions when an external marker is assigned to an exam sitting
| Status | Description |
|---|---|
| Awaiting feedback | The student has submitted the exam, and it is awaiting feedback from the marker. |
| Abandoned | The student started the exam. |
| Not taken | The student did not start the exam, and no submission is available to mark. |
| Marking in progress | The marker has clicked 'Save' on the submission, but did not check 'Marking complete'. |
| Marking complete | The marker has checked 'Marking complete' and clicked save on the submission. |
| Awaiting external review | The submission has been assigned to the external marker, and the external marker has not started marking. |
| External review in progress | The external marker has clicked 'Save' on the submission, but did not check 'External review complete'. |
| External review complete | The external marker has checked 'External review complete' and clicked save on the submission. |
Downloading external marker scores
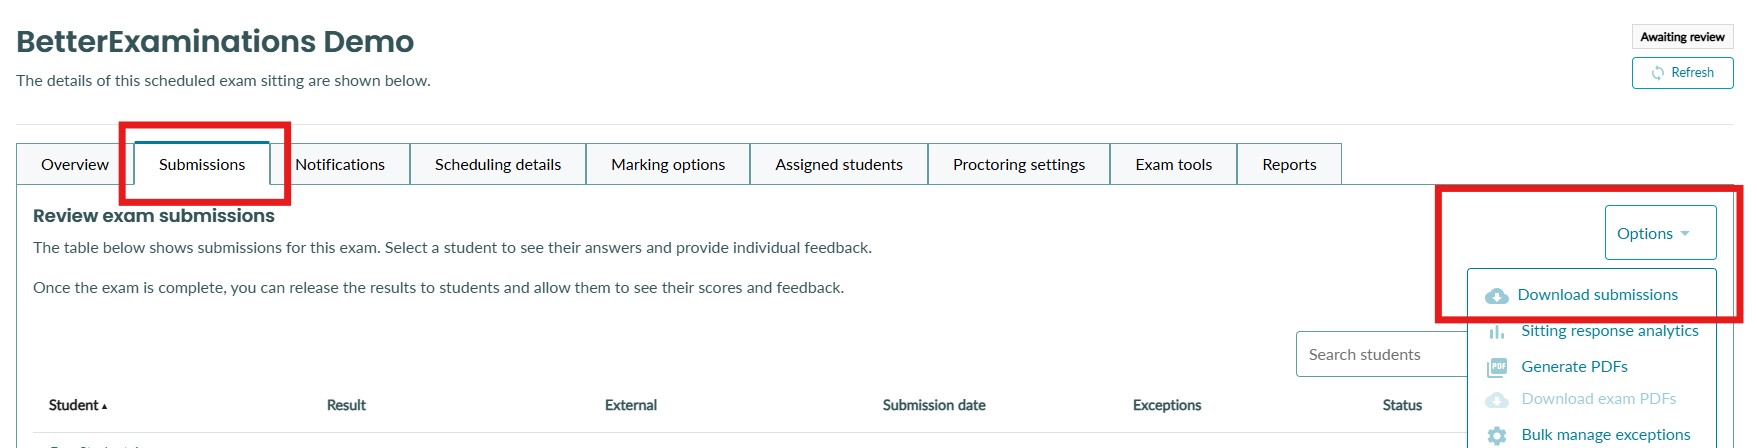
1. Navigate to the exam sitting submissions tab, select the options dropdown, and select 'Download submissions'
2. You can choose to download all student submissions, just the ones that started/submitted the exam, or the students that did not take the exam. Select an option and select 'Download CSV'. 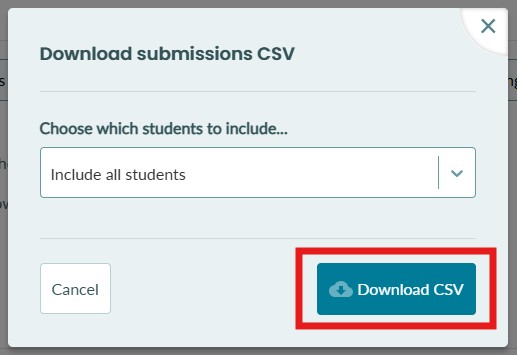
3. In the CSV, for the total points, you will now see the following additional columns.
- External Total Points. This is the total score for the external marker.
- External Q.1 - Next to each question score, a new column is added with the external marker's score for that question.
If a submission is not sent to the external marker, these columns will show 'Not sent'.
